 "Jake - Has Bad Luck So You Don't Have To" (murdersofa)
07/18/2017 at 10:00 • Filed to: fast not loud, live fast not loud, jaguar, jaguar xj-s, xj-s, chevy, sbc, v8, paint correction, polish, detailing
 7
7
 13
13|
"Jake - Has Bad Luck So You Don't Have To" (murdersofa)
07/18/2017 at 10:00 • Filed to: fast not loud, live fast not loud, jaguar, jaguar xj-s, xj-s, chevy, sbc, v8, paint correction, polish, detailing | 7
| 13 |
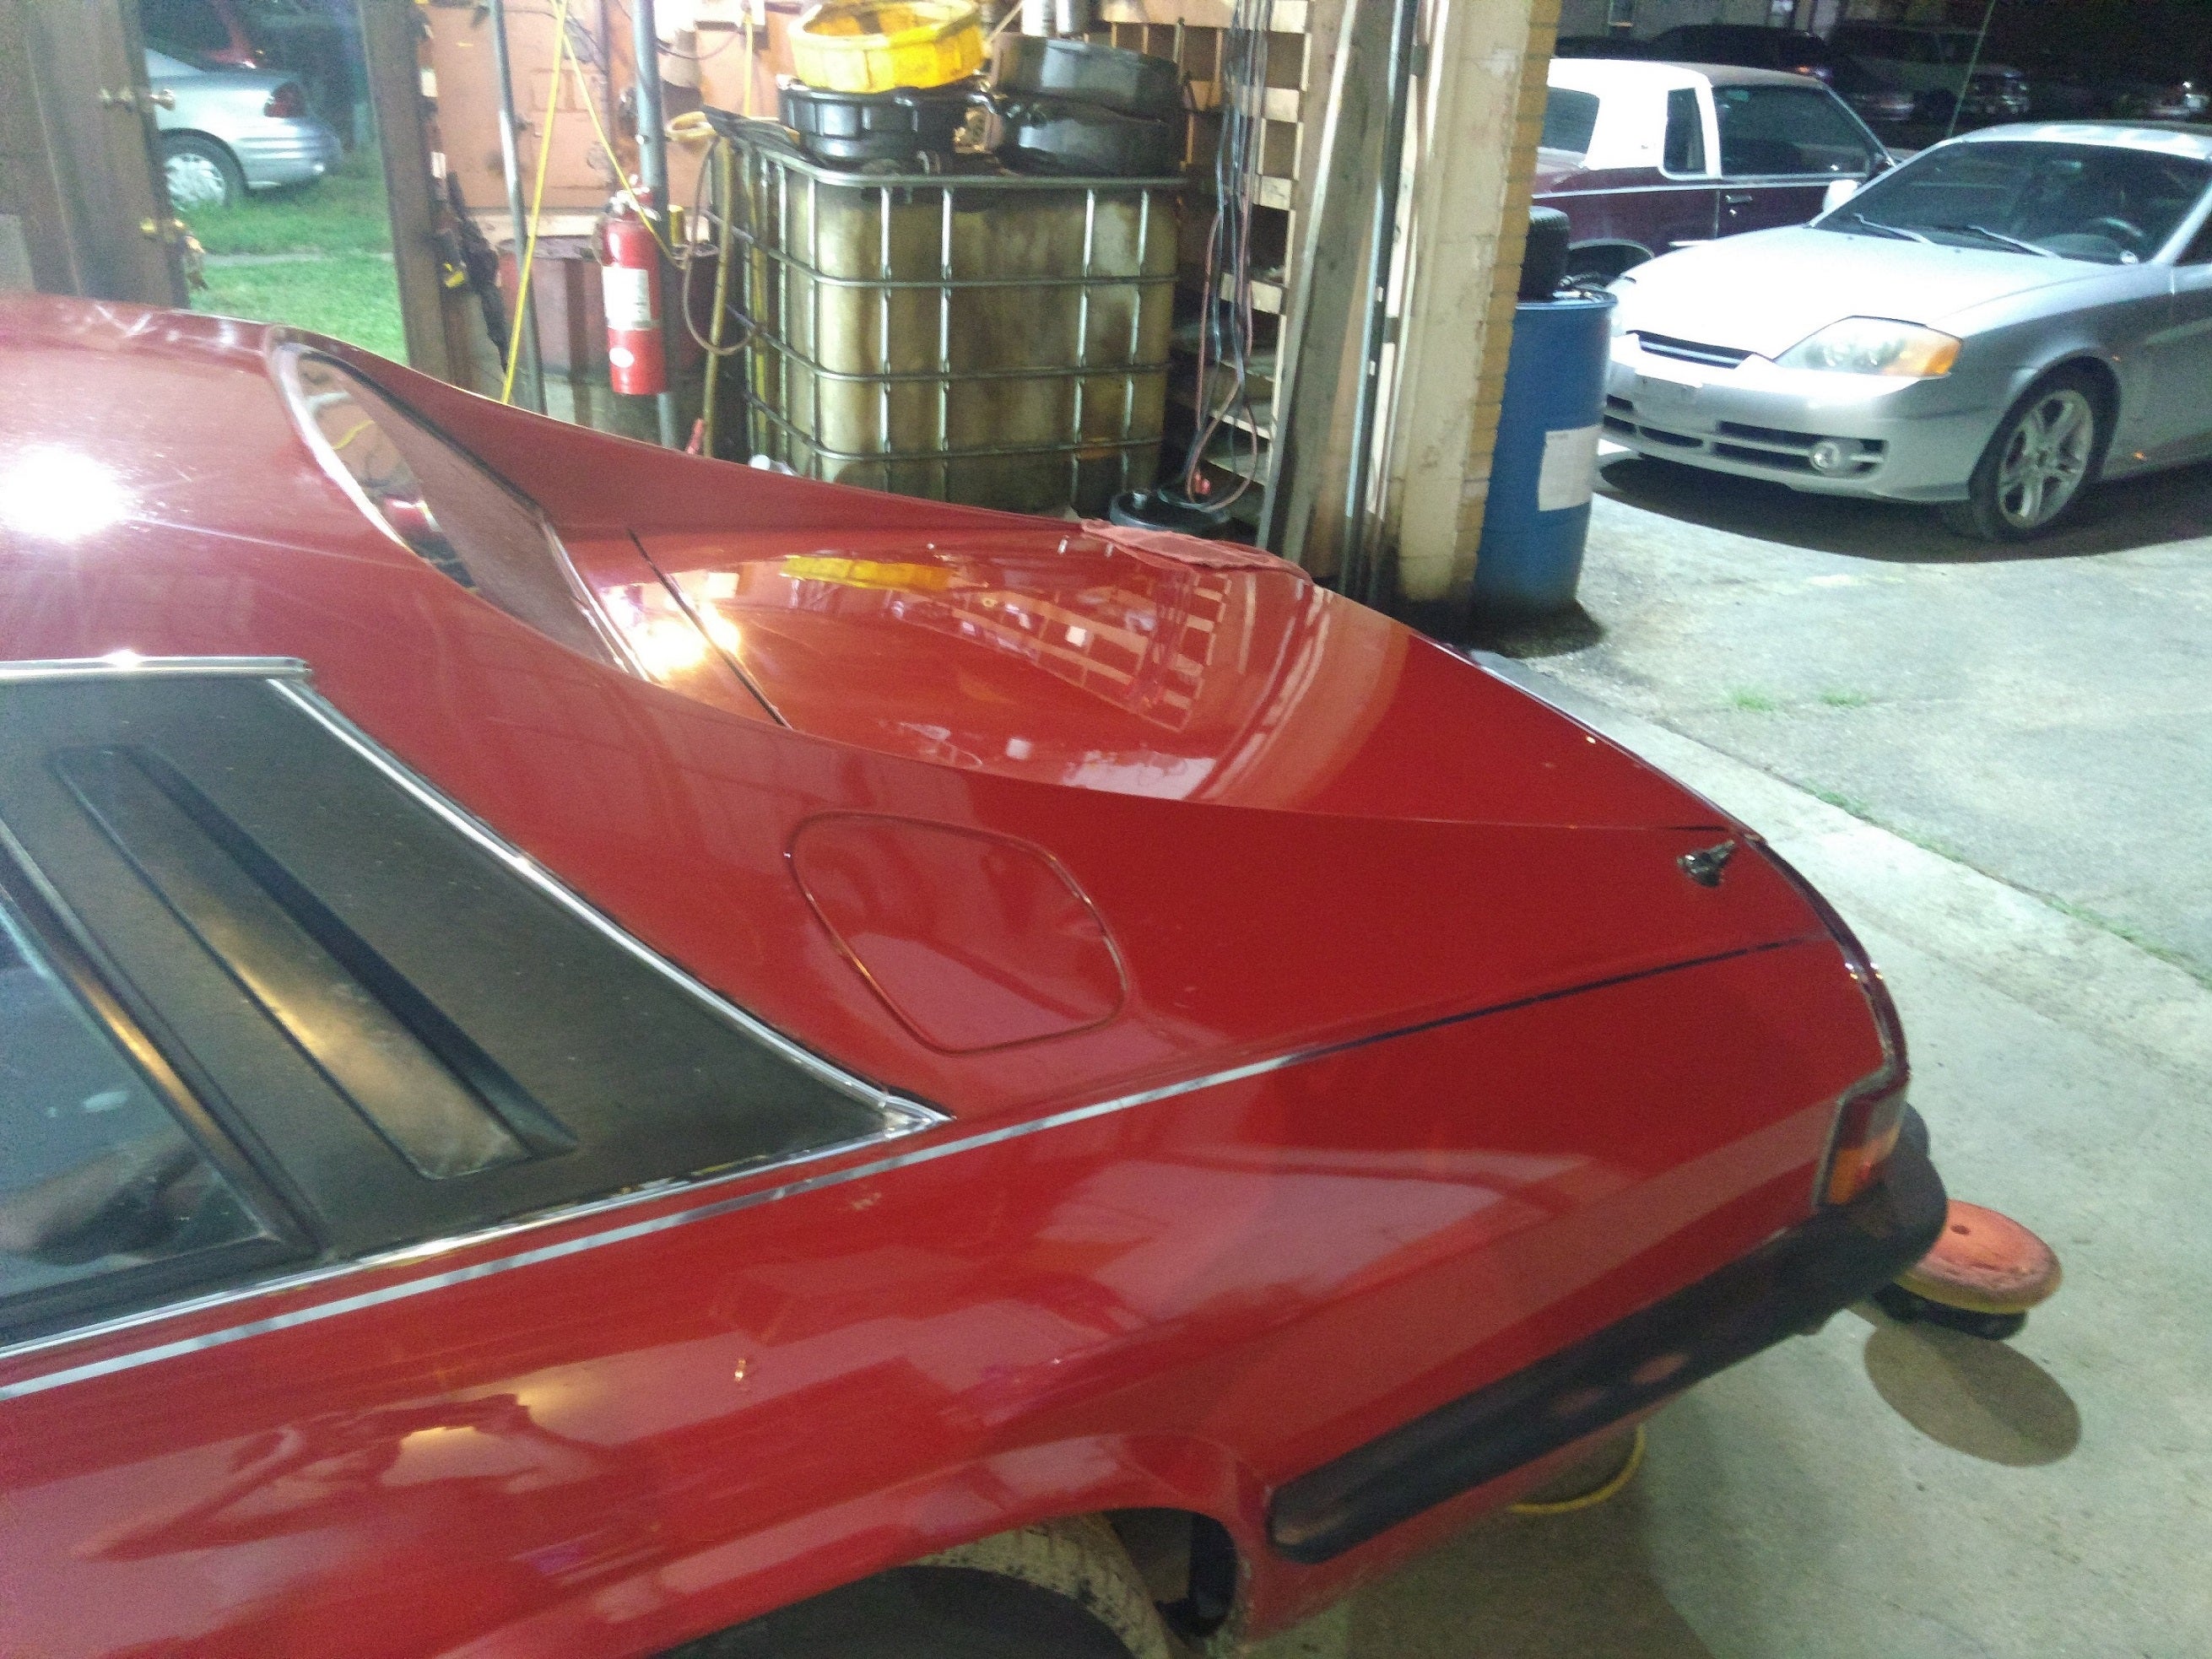
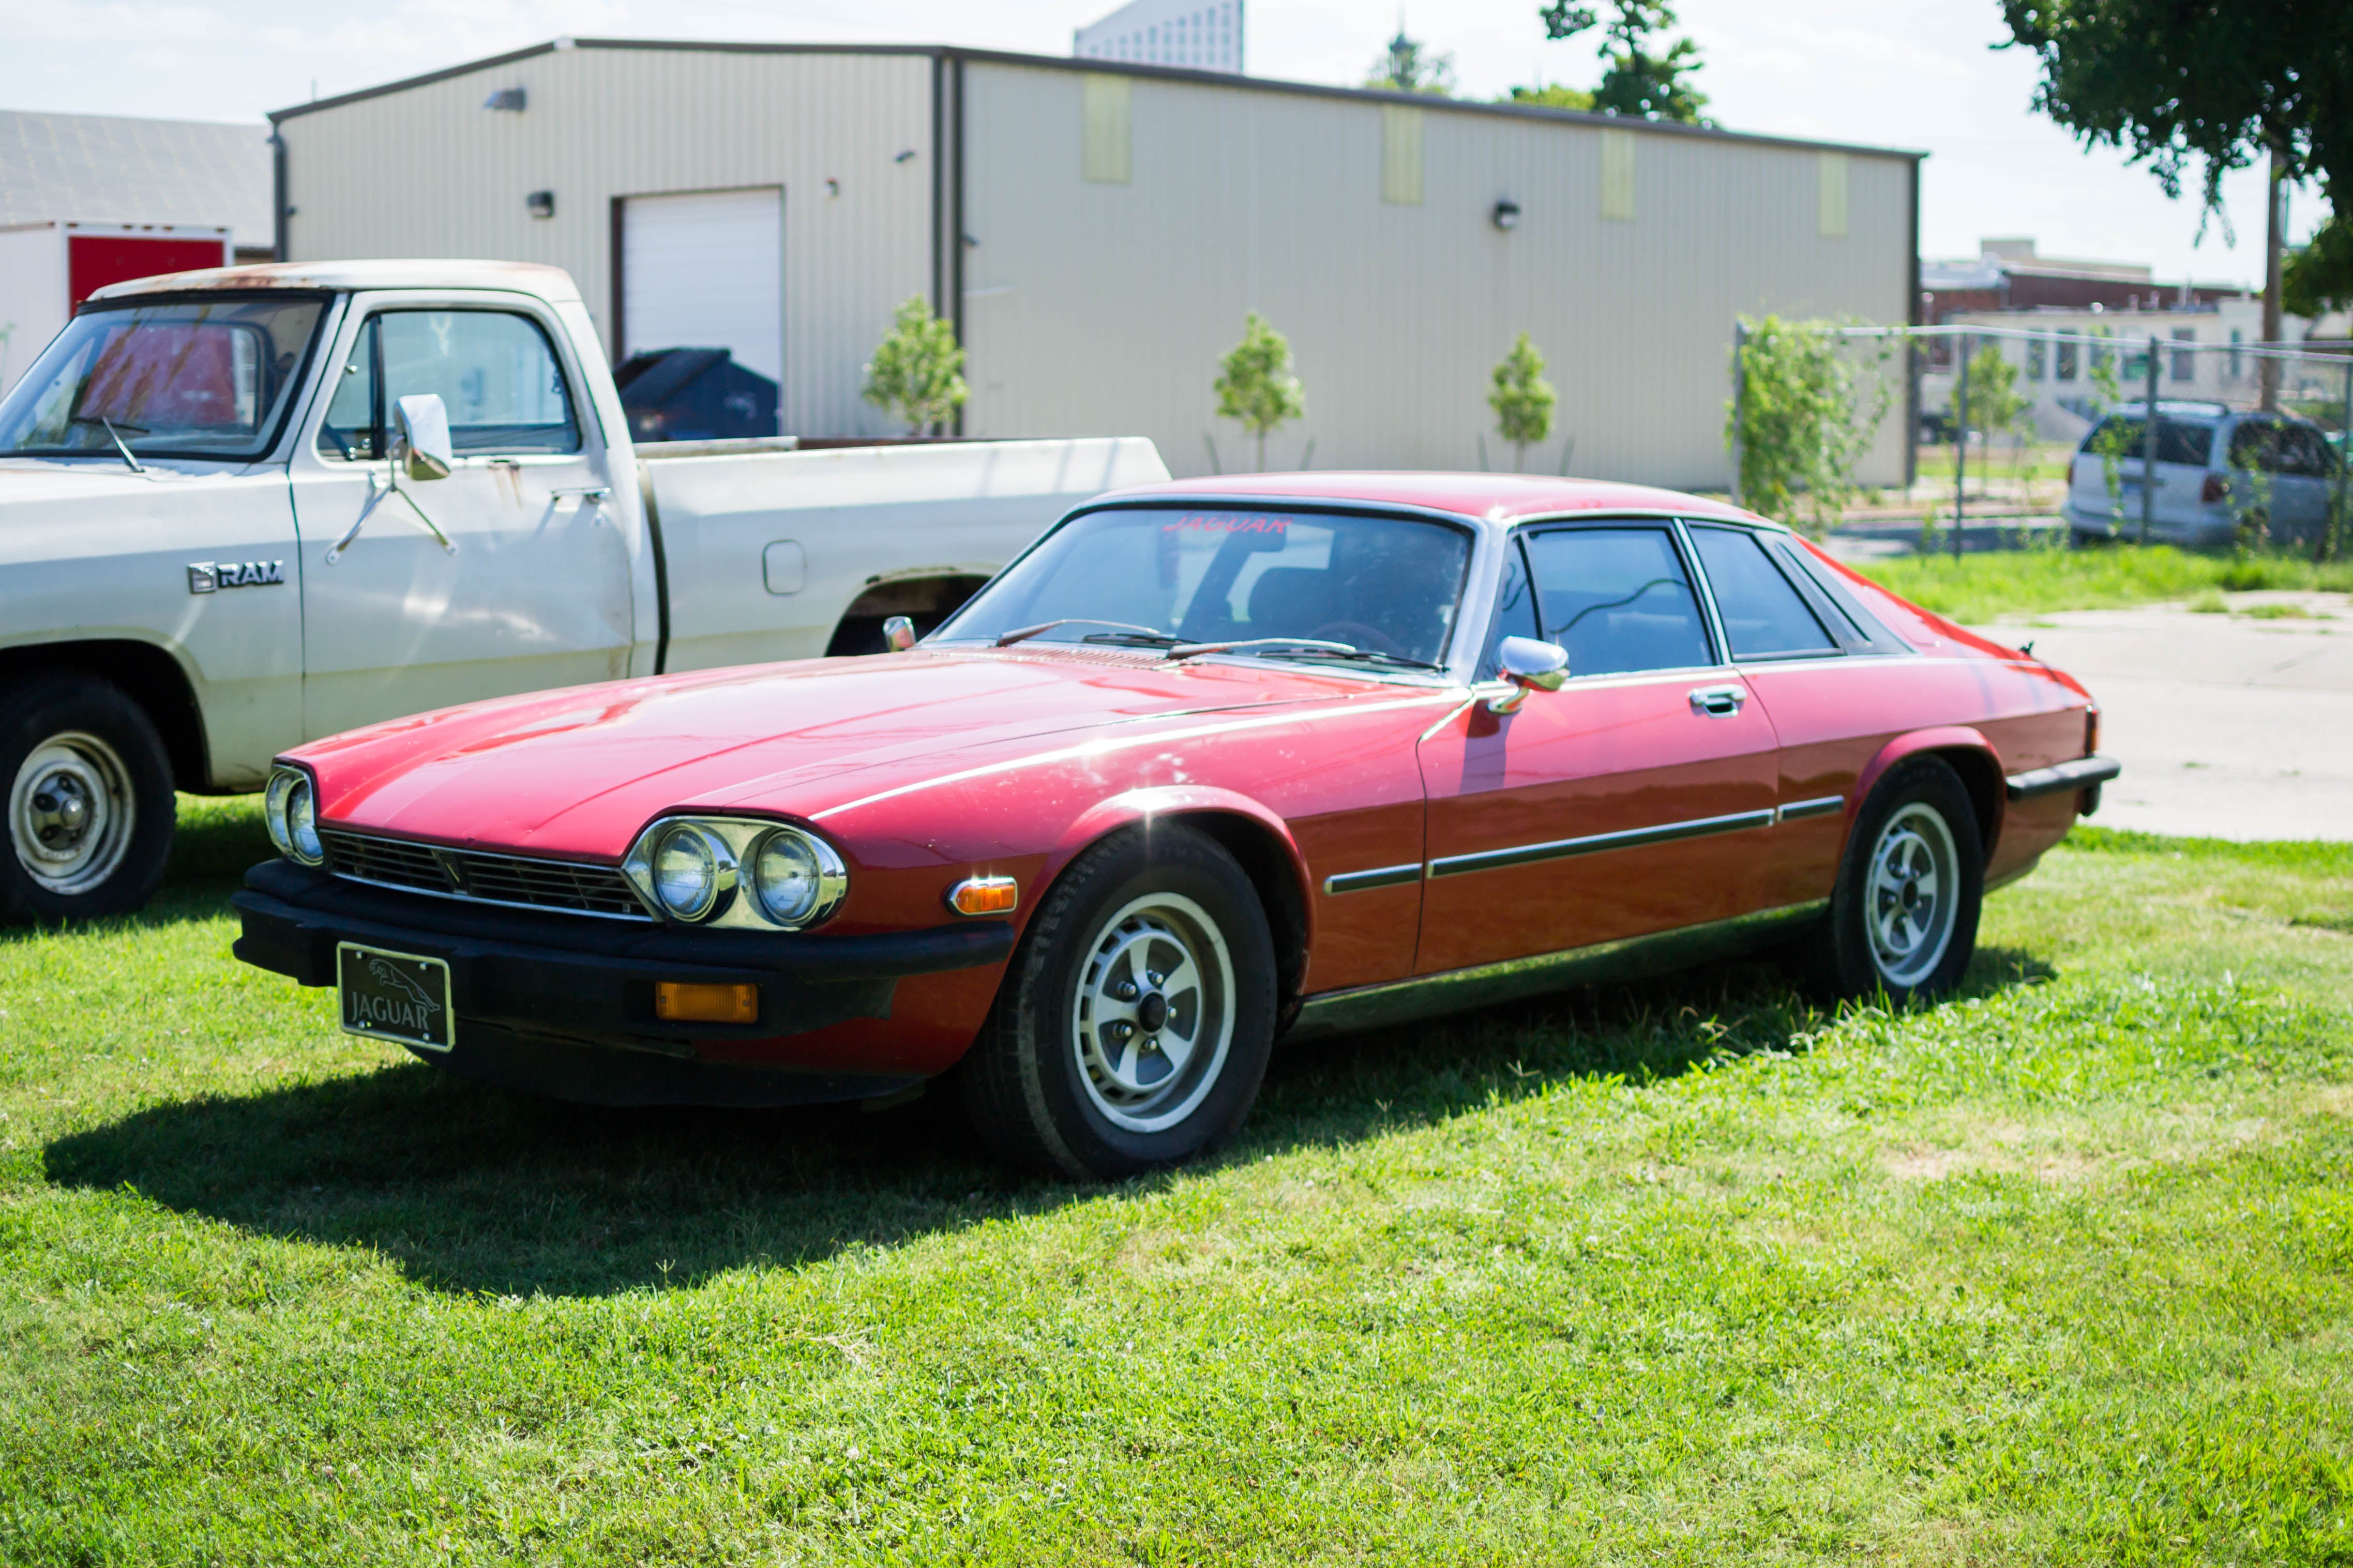
My 1977 Jaguar was certainly a looker, with its long hood and low proportions, tires filling up the wheel wells and the unique flying buttress design in the rear. But for this it did have one glaring flaw: the paint was utter garbage. Oxidized to within an inch of its life and cracking all over I cringed full-body at the thought of a respray of the single-stage red that adorned my Leyland lounge. Fortunately a friend of mine has a large stable of polishing and paint correcting knowledge and tools and was gracious enough to let me borrow some. Here’s how I turned my Jaguar XJ-S from coal into diamonds. Really, really shit diamonds. Ones with defects and stuff that end up used industrially.
Like cars? Like this article? !!!error: Indecipherable SUB-paragraph formatting!!! and more like it on !!!error: Indecipherable SUB-paragraph formatting!!! , a long-form blog about cars and life. But with less Kinja.

Part of the reason for the paint’s terrible condition is age, wear, tear, and poor maintenance. The other part is because I’m a tremendous idiot who was in a hurry and ignored one of the primary rules of auto detailing: when trying a new product test it out in an inconspicuous area. In the past I have worked at dealership and we used red bought-in-bulk engine degreaser as a kind of general-purpose aggressive soap. Bugs? Degreaser. Tire marks? Degreaser. Car sat outside for ages and has years of dust embedded in the paint? Degreaser. I had great luck in using red engine degreaser to bring the dingy brownish paint back to a dull shine before attempting further correction. So it was before my trip to Oklahoma that I picked up a spray bottle of degreaser from the local auto parts store. I washed the car then drove to Walmart and saw this.
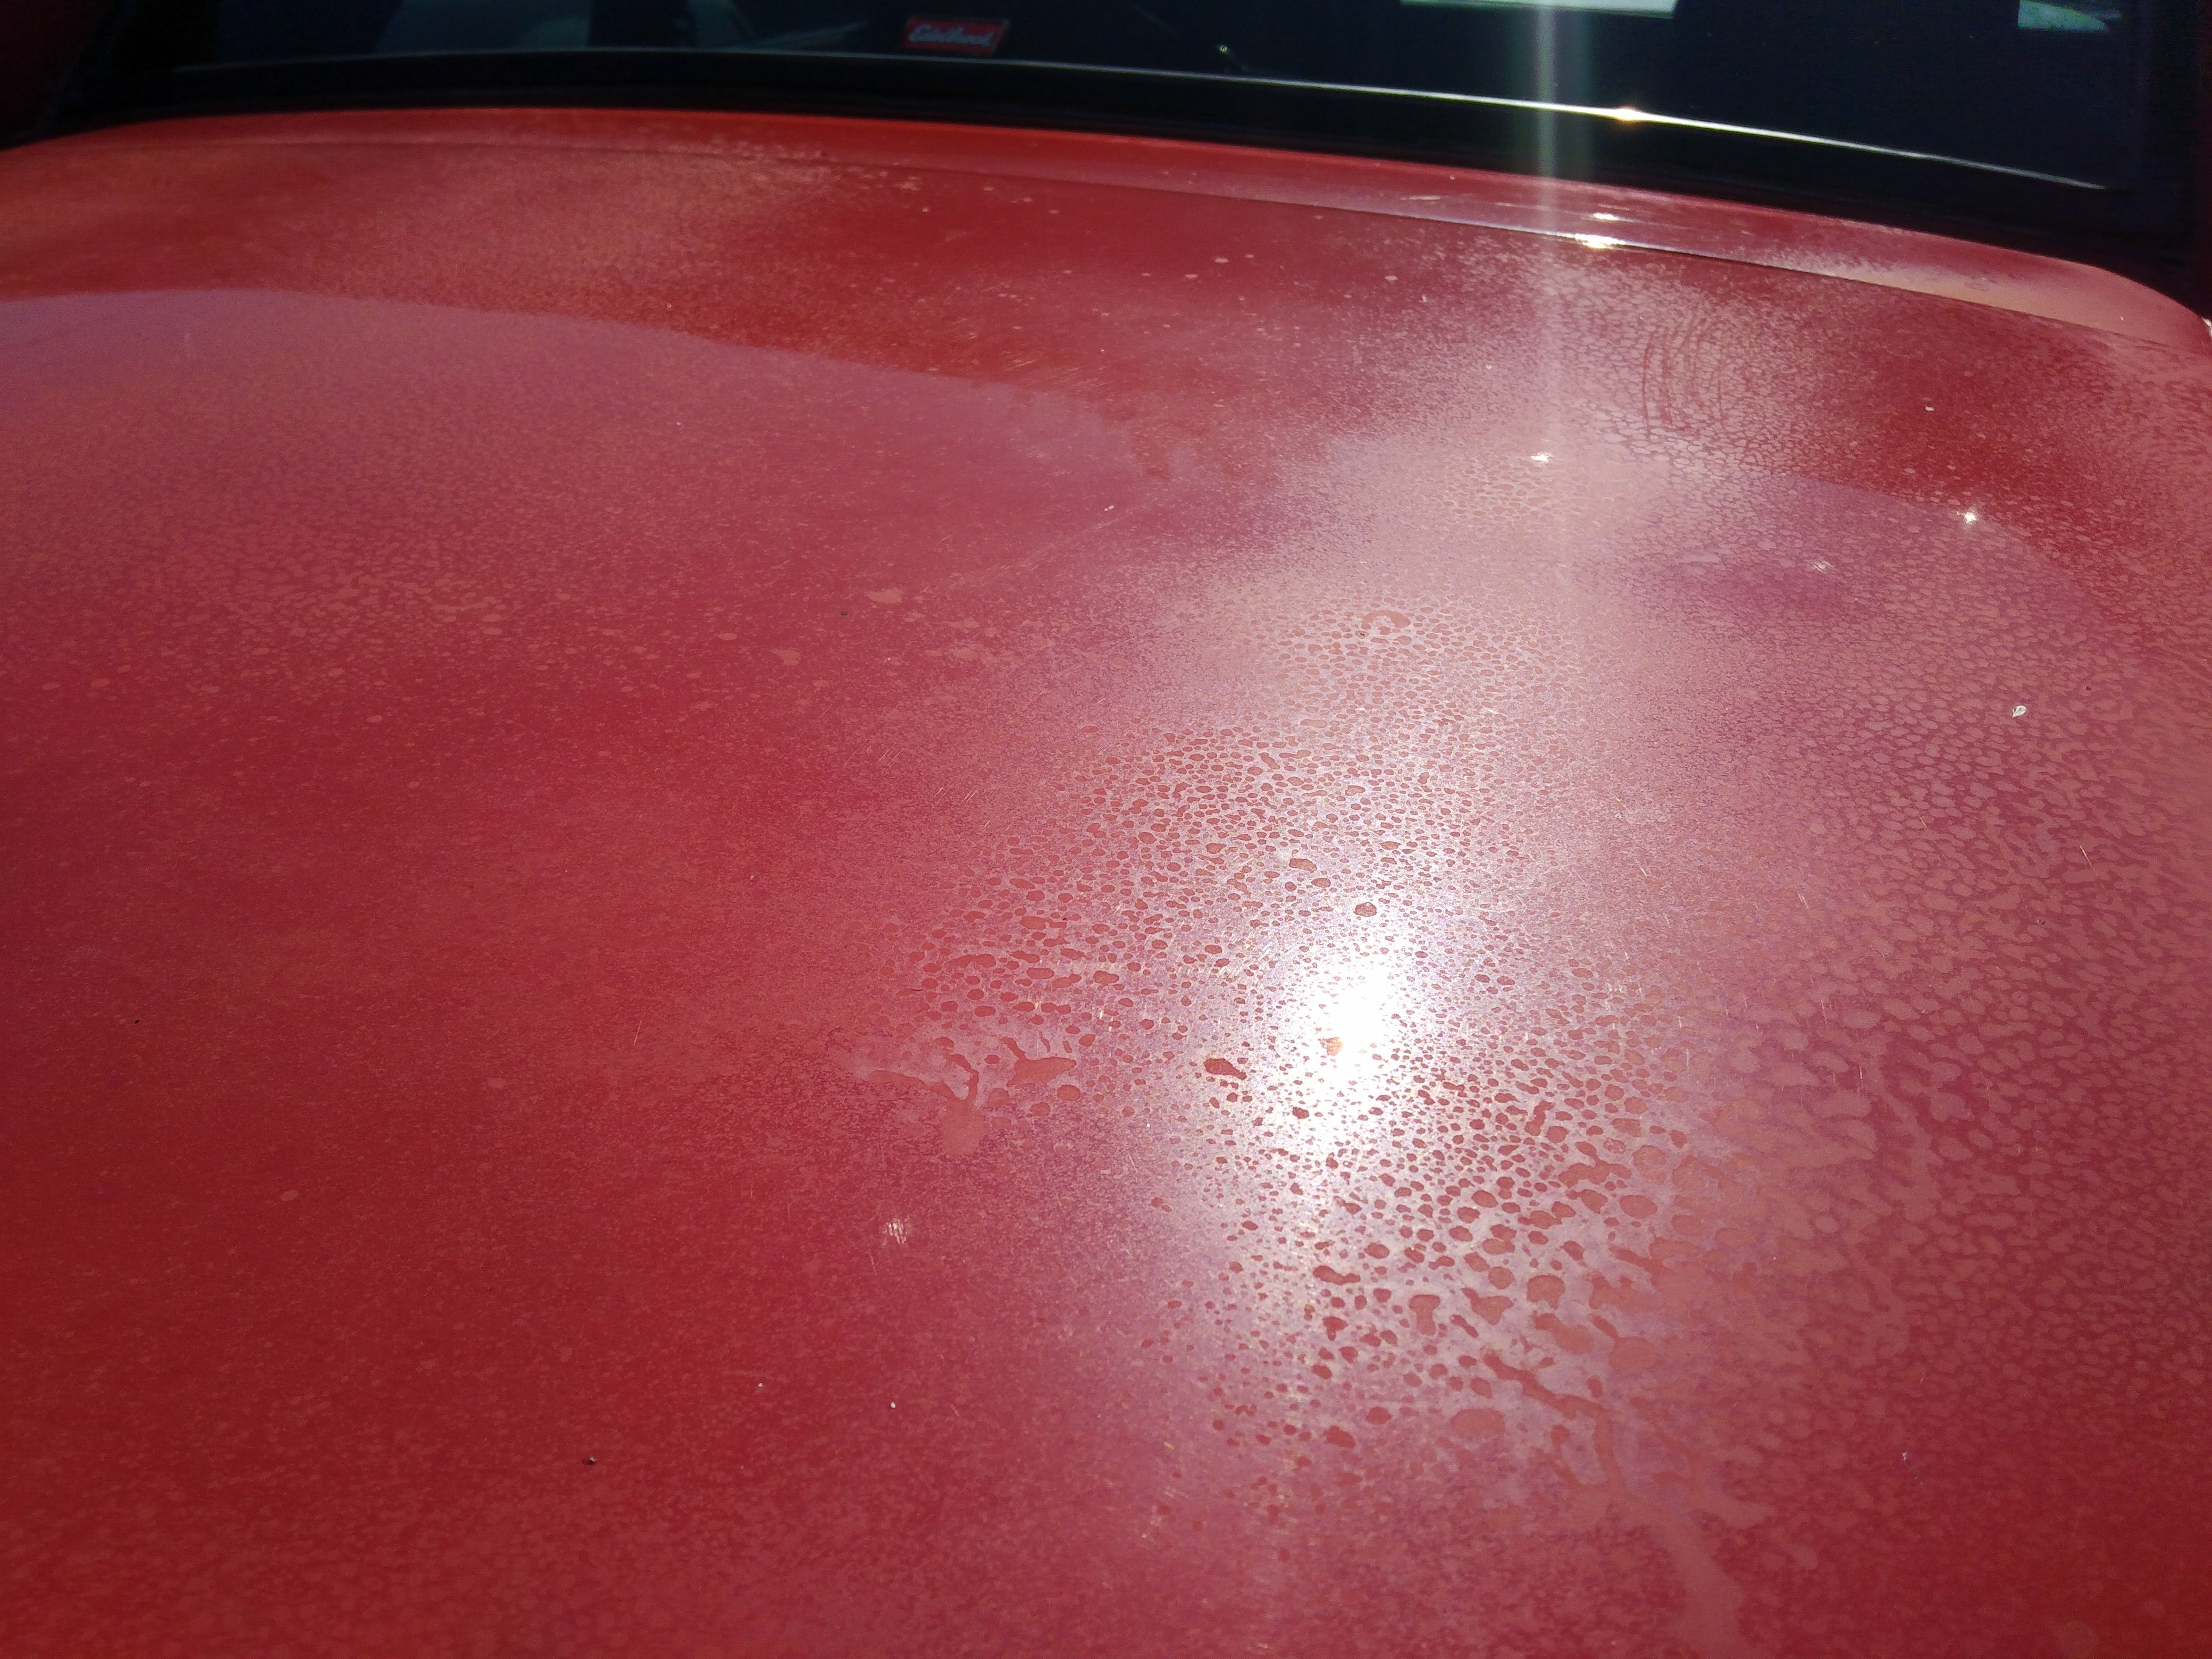

Not good. Something in the degreaser instantly reacted with the paint and resulted in heavy oxidation and spotting. No amount of washing the car was taking it off so more drastic measured had to be taken.
Quick note: I am not a professional detailer. I don’t really know what I’m doing. This article is for entertainment purposes only as every car, situation, and paint is different. What works for me could easily result in ruined paint for you so please consult a detailing professional or your local supply store for advice and suggestions on how to approach your particular issue.
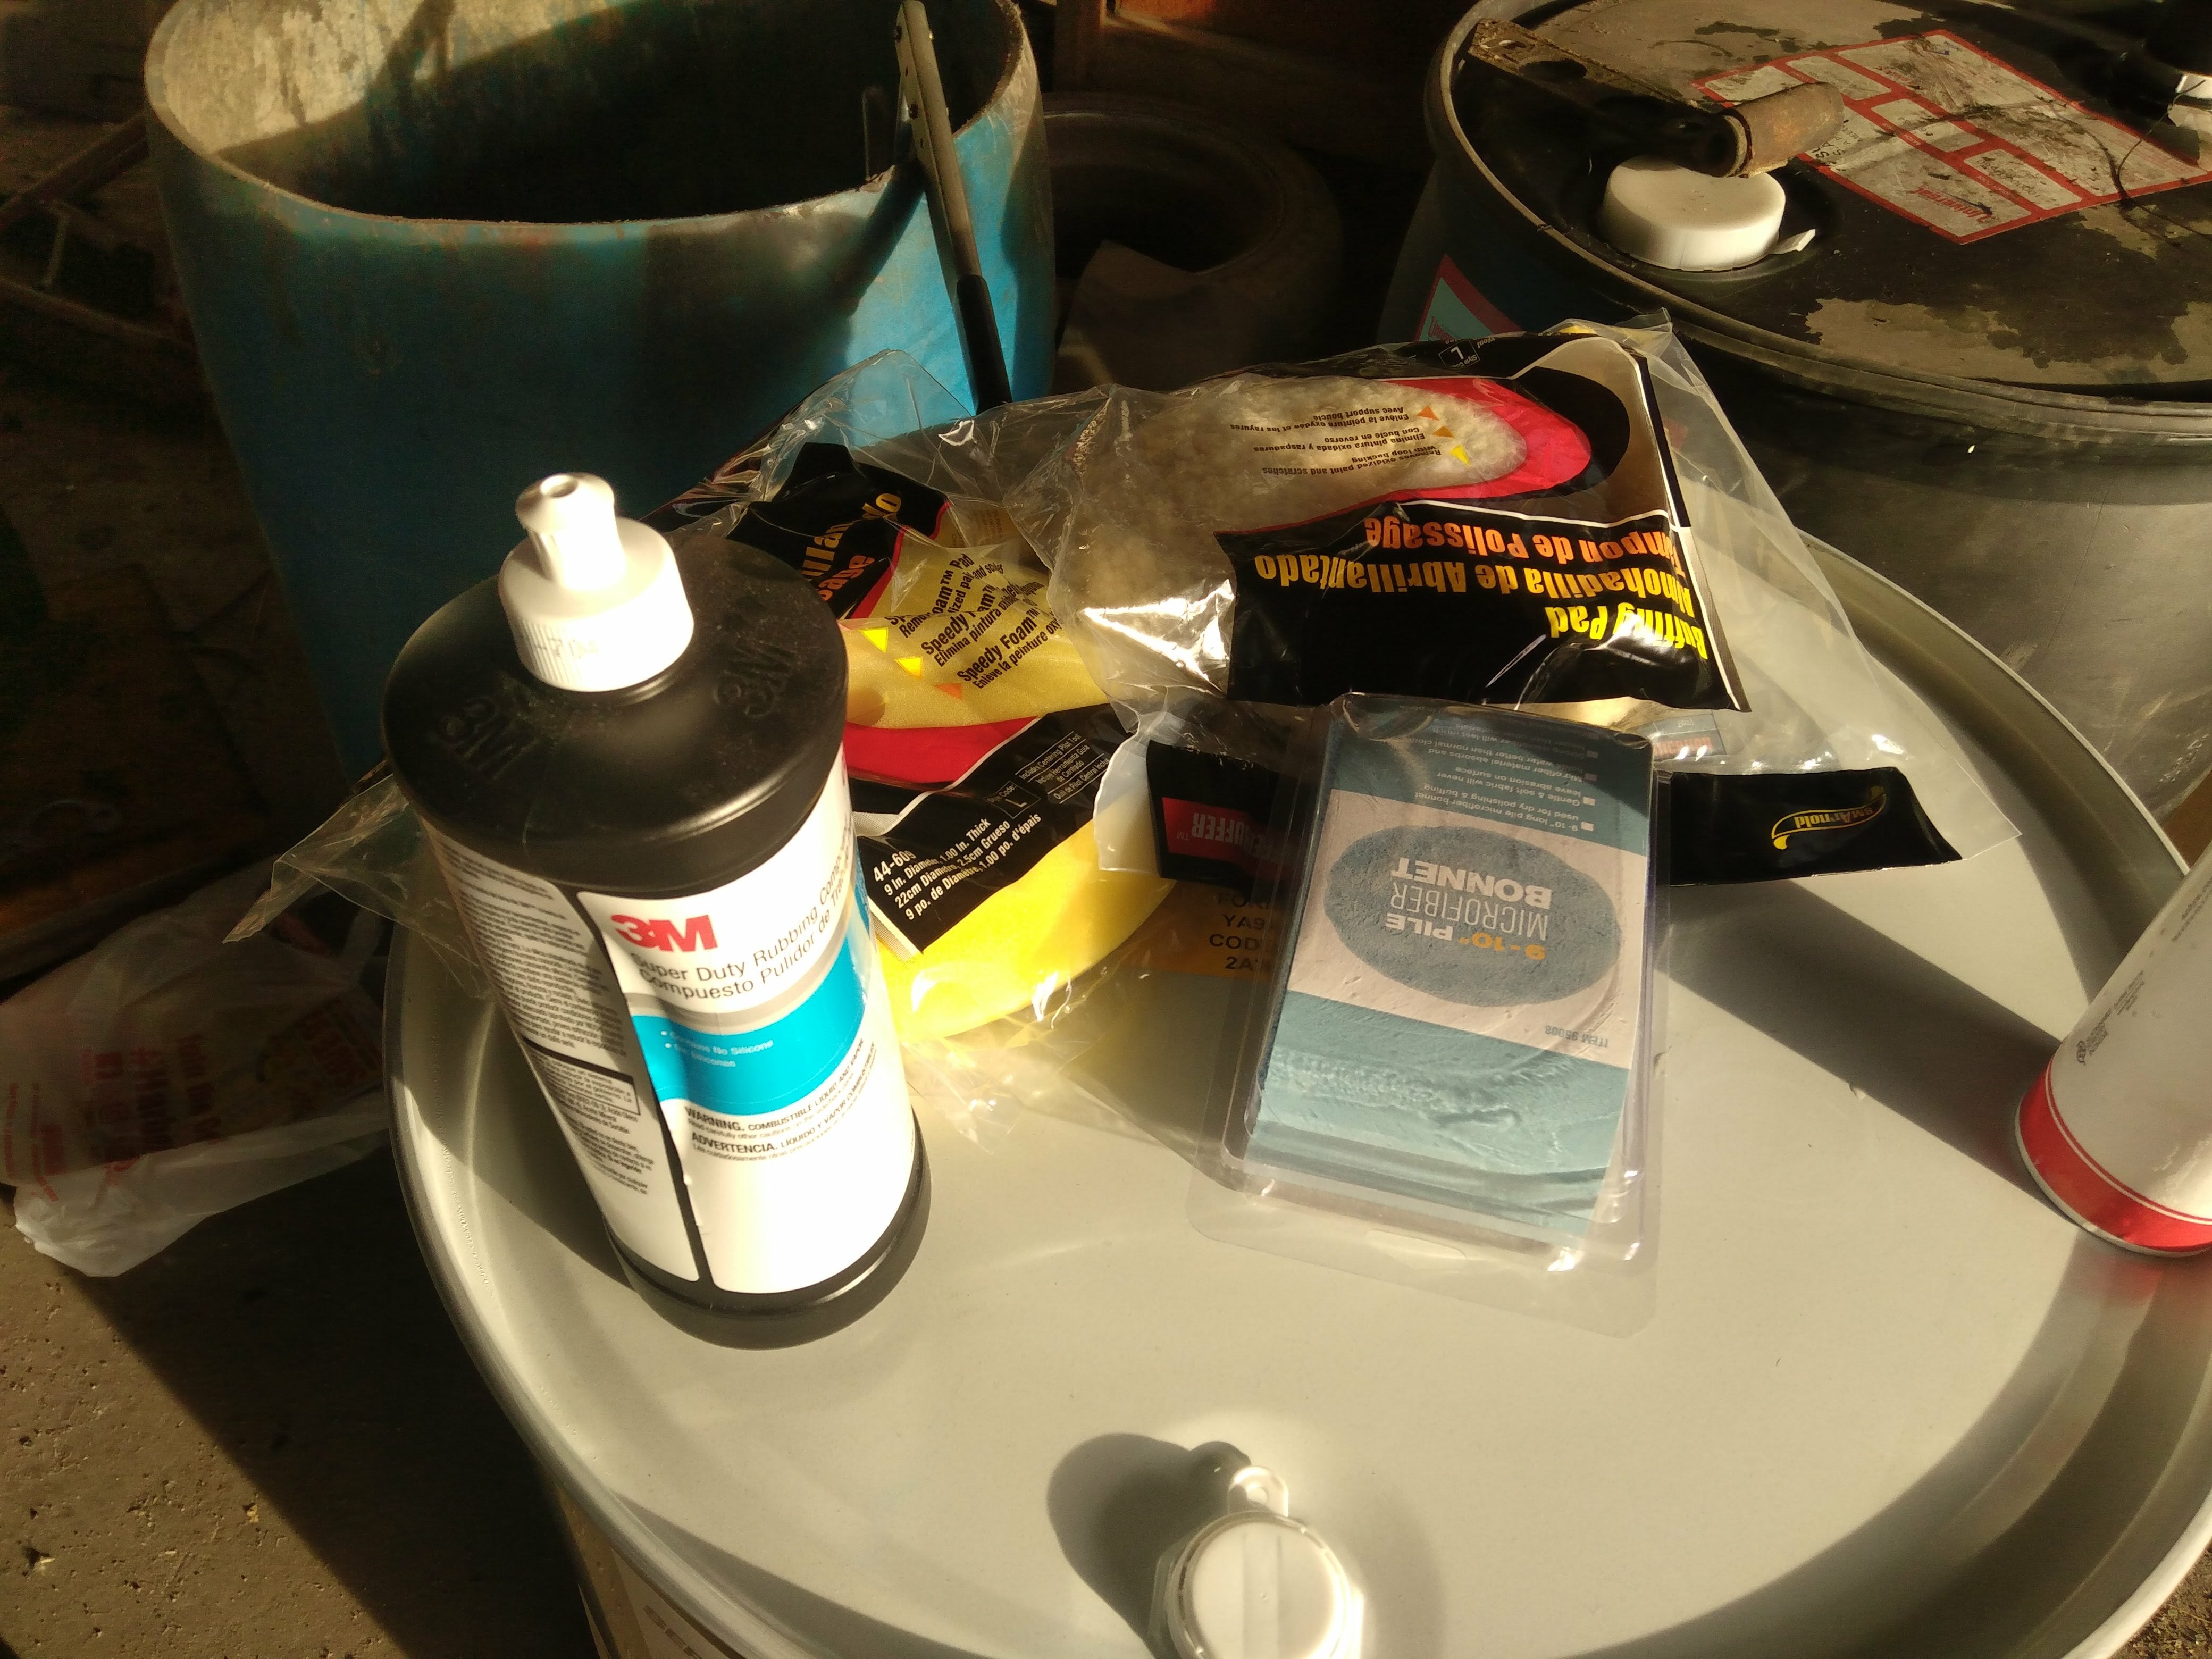
This was going to be a two-stage correction. The first stage would be using 3M 05954 Super Duty Rubbing Compound on a Harbor Freight wool pad on a rotary buffer.
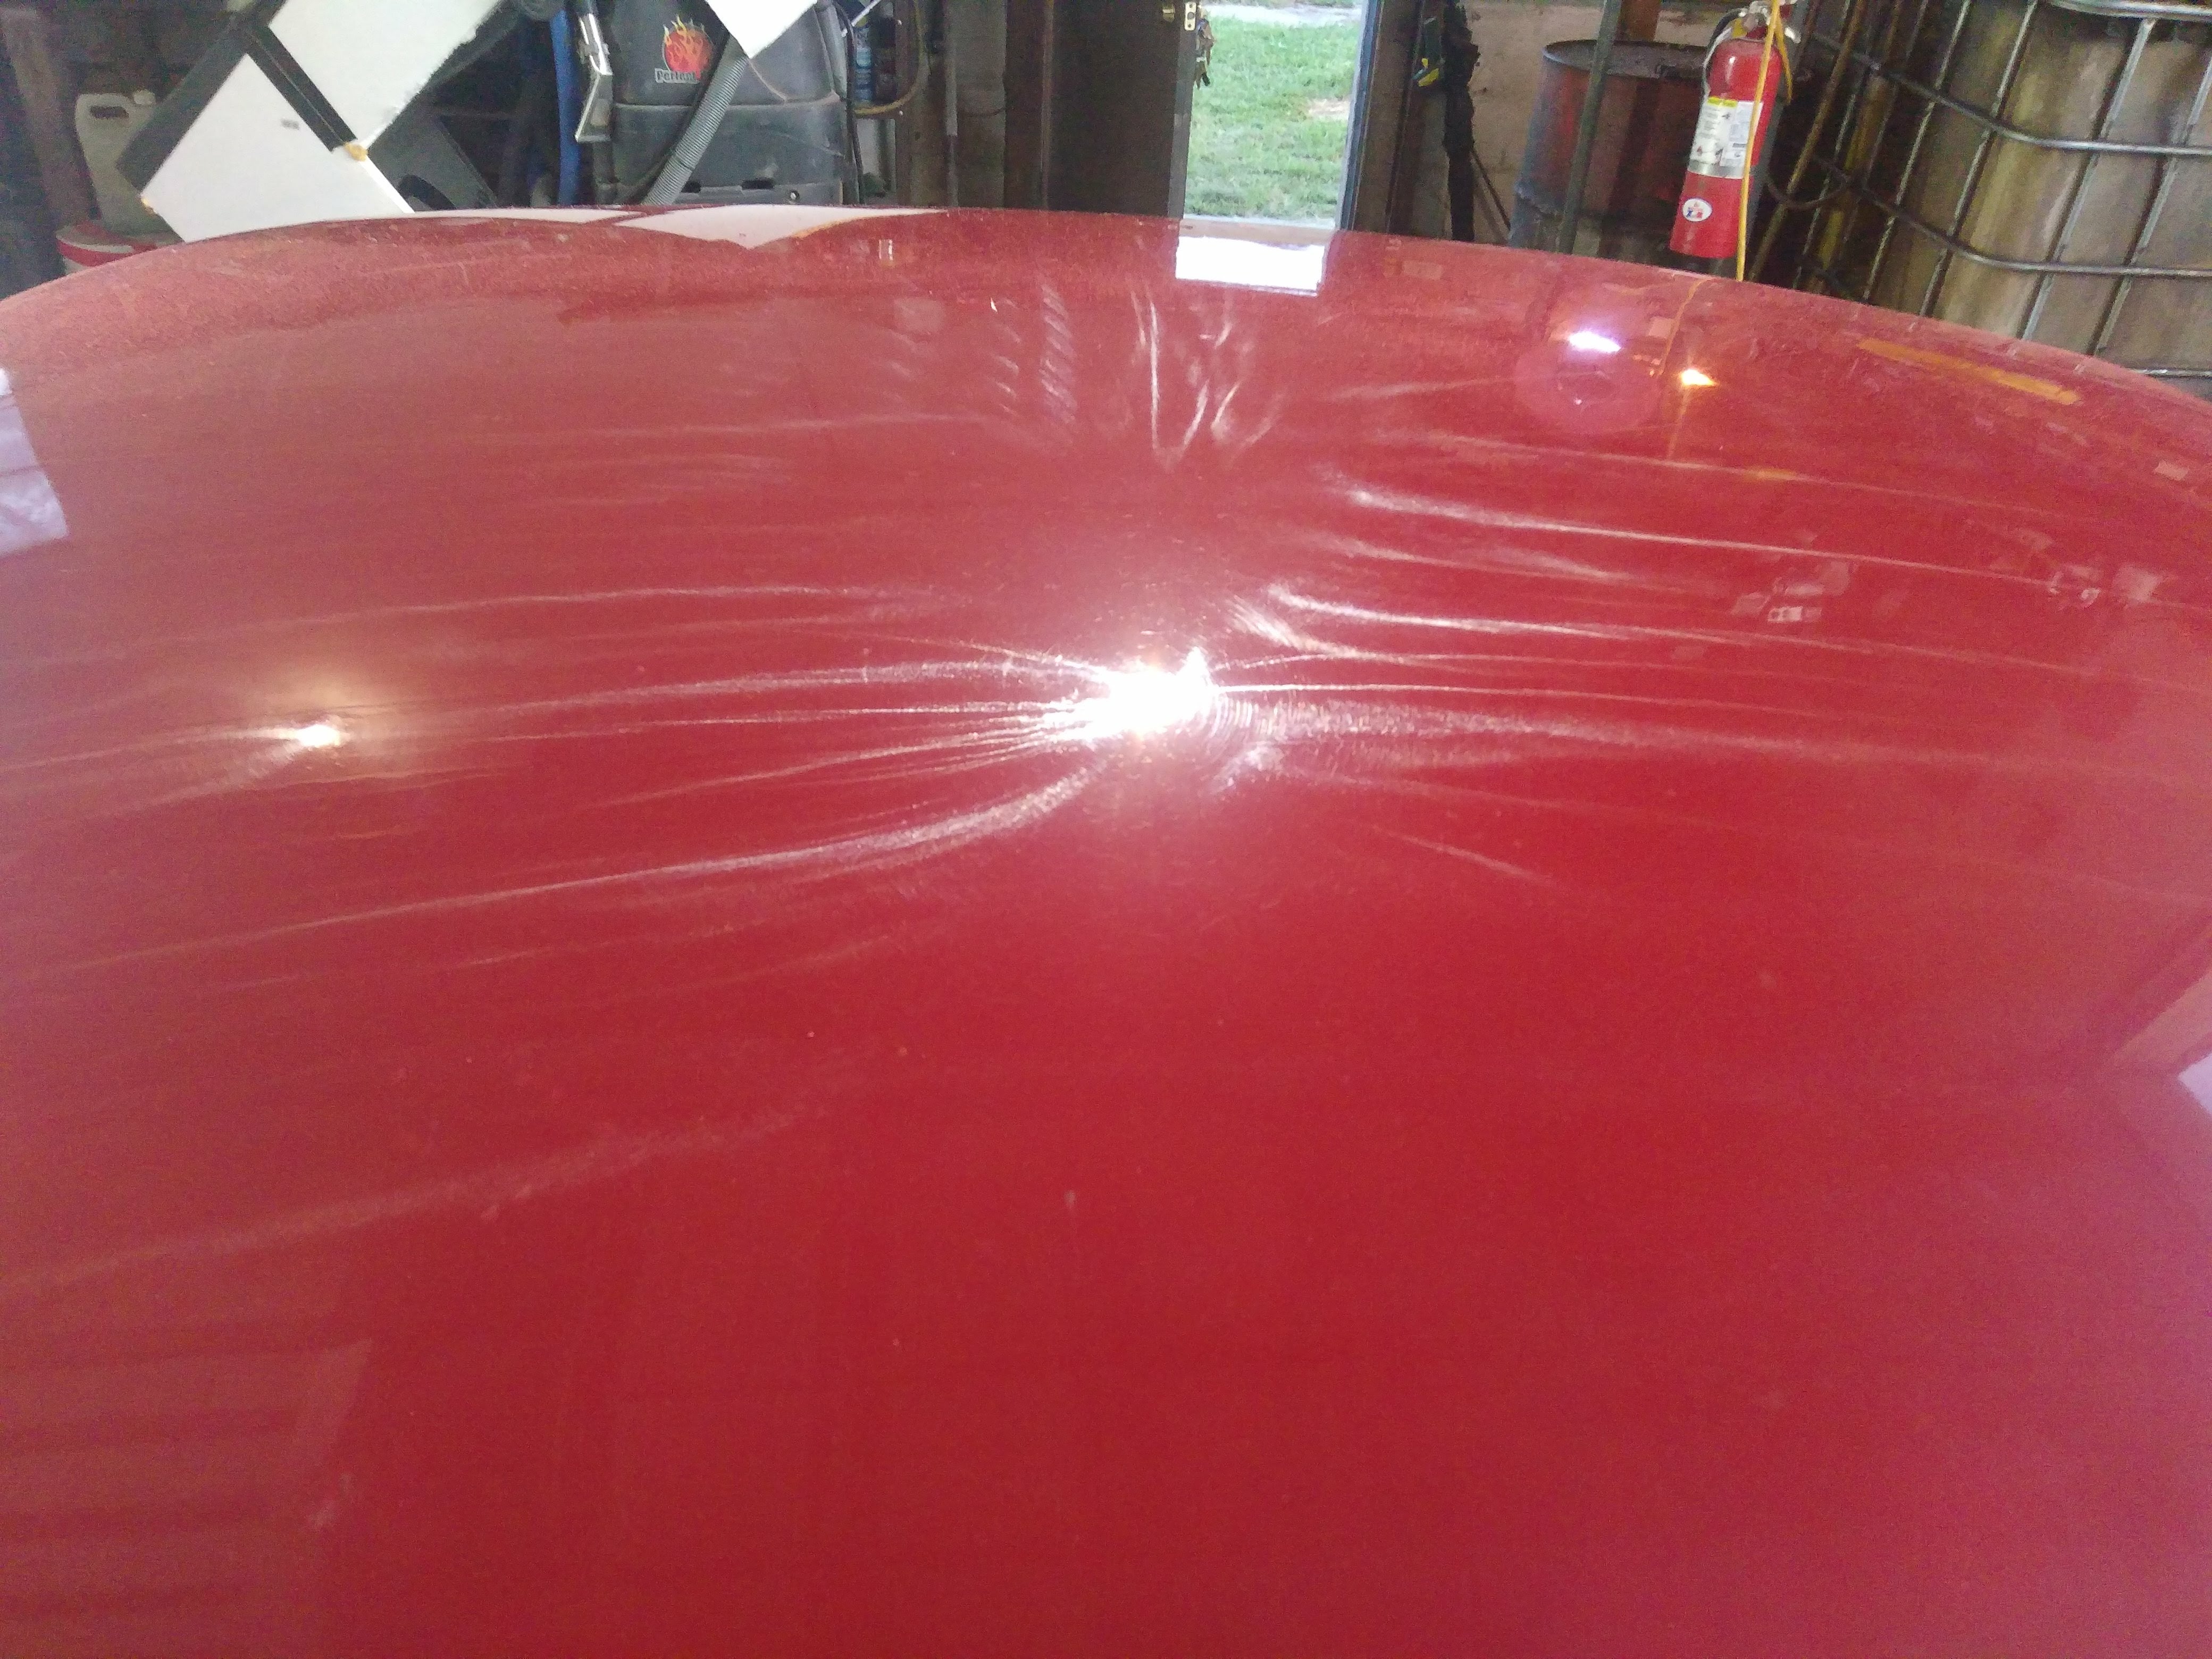
This. Stuff. Is. Dangerous. More aggressive than wetsanding, you and your car will get coated in dust particles that were once the top layer of the single-stage paint. The result is heavily swirled and hologrammed but free of most defects. As a bonus, the wool pad gets loaded up with melted paint which is then spread around and can actually help hide paint defects like deep scratches and cracks by filling them in with melted paint. Be careful on edges and protrusions. I actually wore through the paint on a piece of my gas lid and the very edge of my hood in one place because it was sticking up. Only after wondering “why was there so much red dust just then” did I notice the bare metal. That is how aggressive this is.
At this point, charge up your phone so you can continue taking pictures. I lacked a proper wall charger so improvisation had to be done.
Now that most of the worst of the damage has been beaten into submission and my paint looks like a cheap 80s sci-fi movie effect it’s time to move onto stage 2. Stage 2 consists of a variable speed dual-action buffer with a foam pad and Meguiar’s Paint Reconditioning Cream D151. I used a heavy pressure and low speed to spread the cream around and work it into the paint and then slowly upped the speed as I went, spending 15 minutes or so on each 2 square foot section.
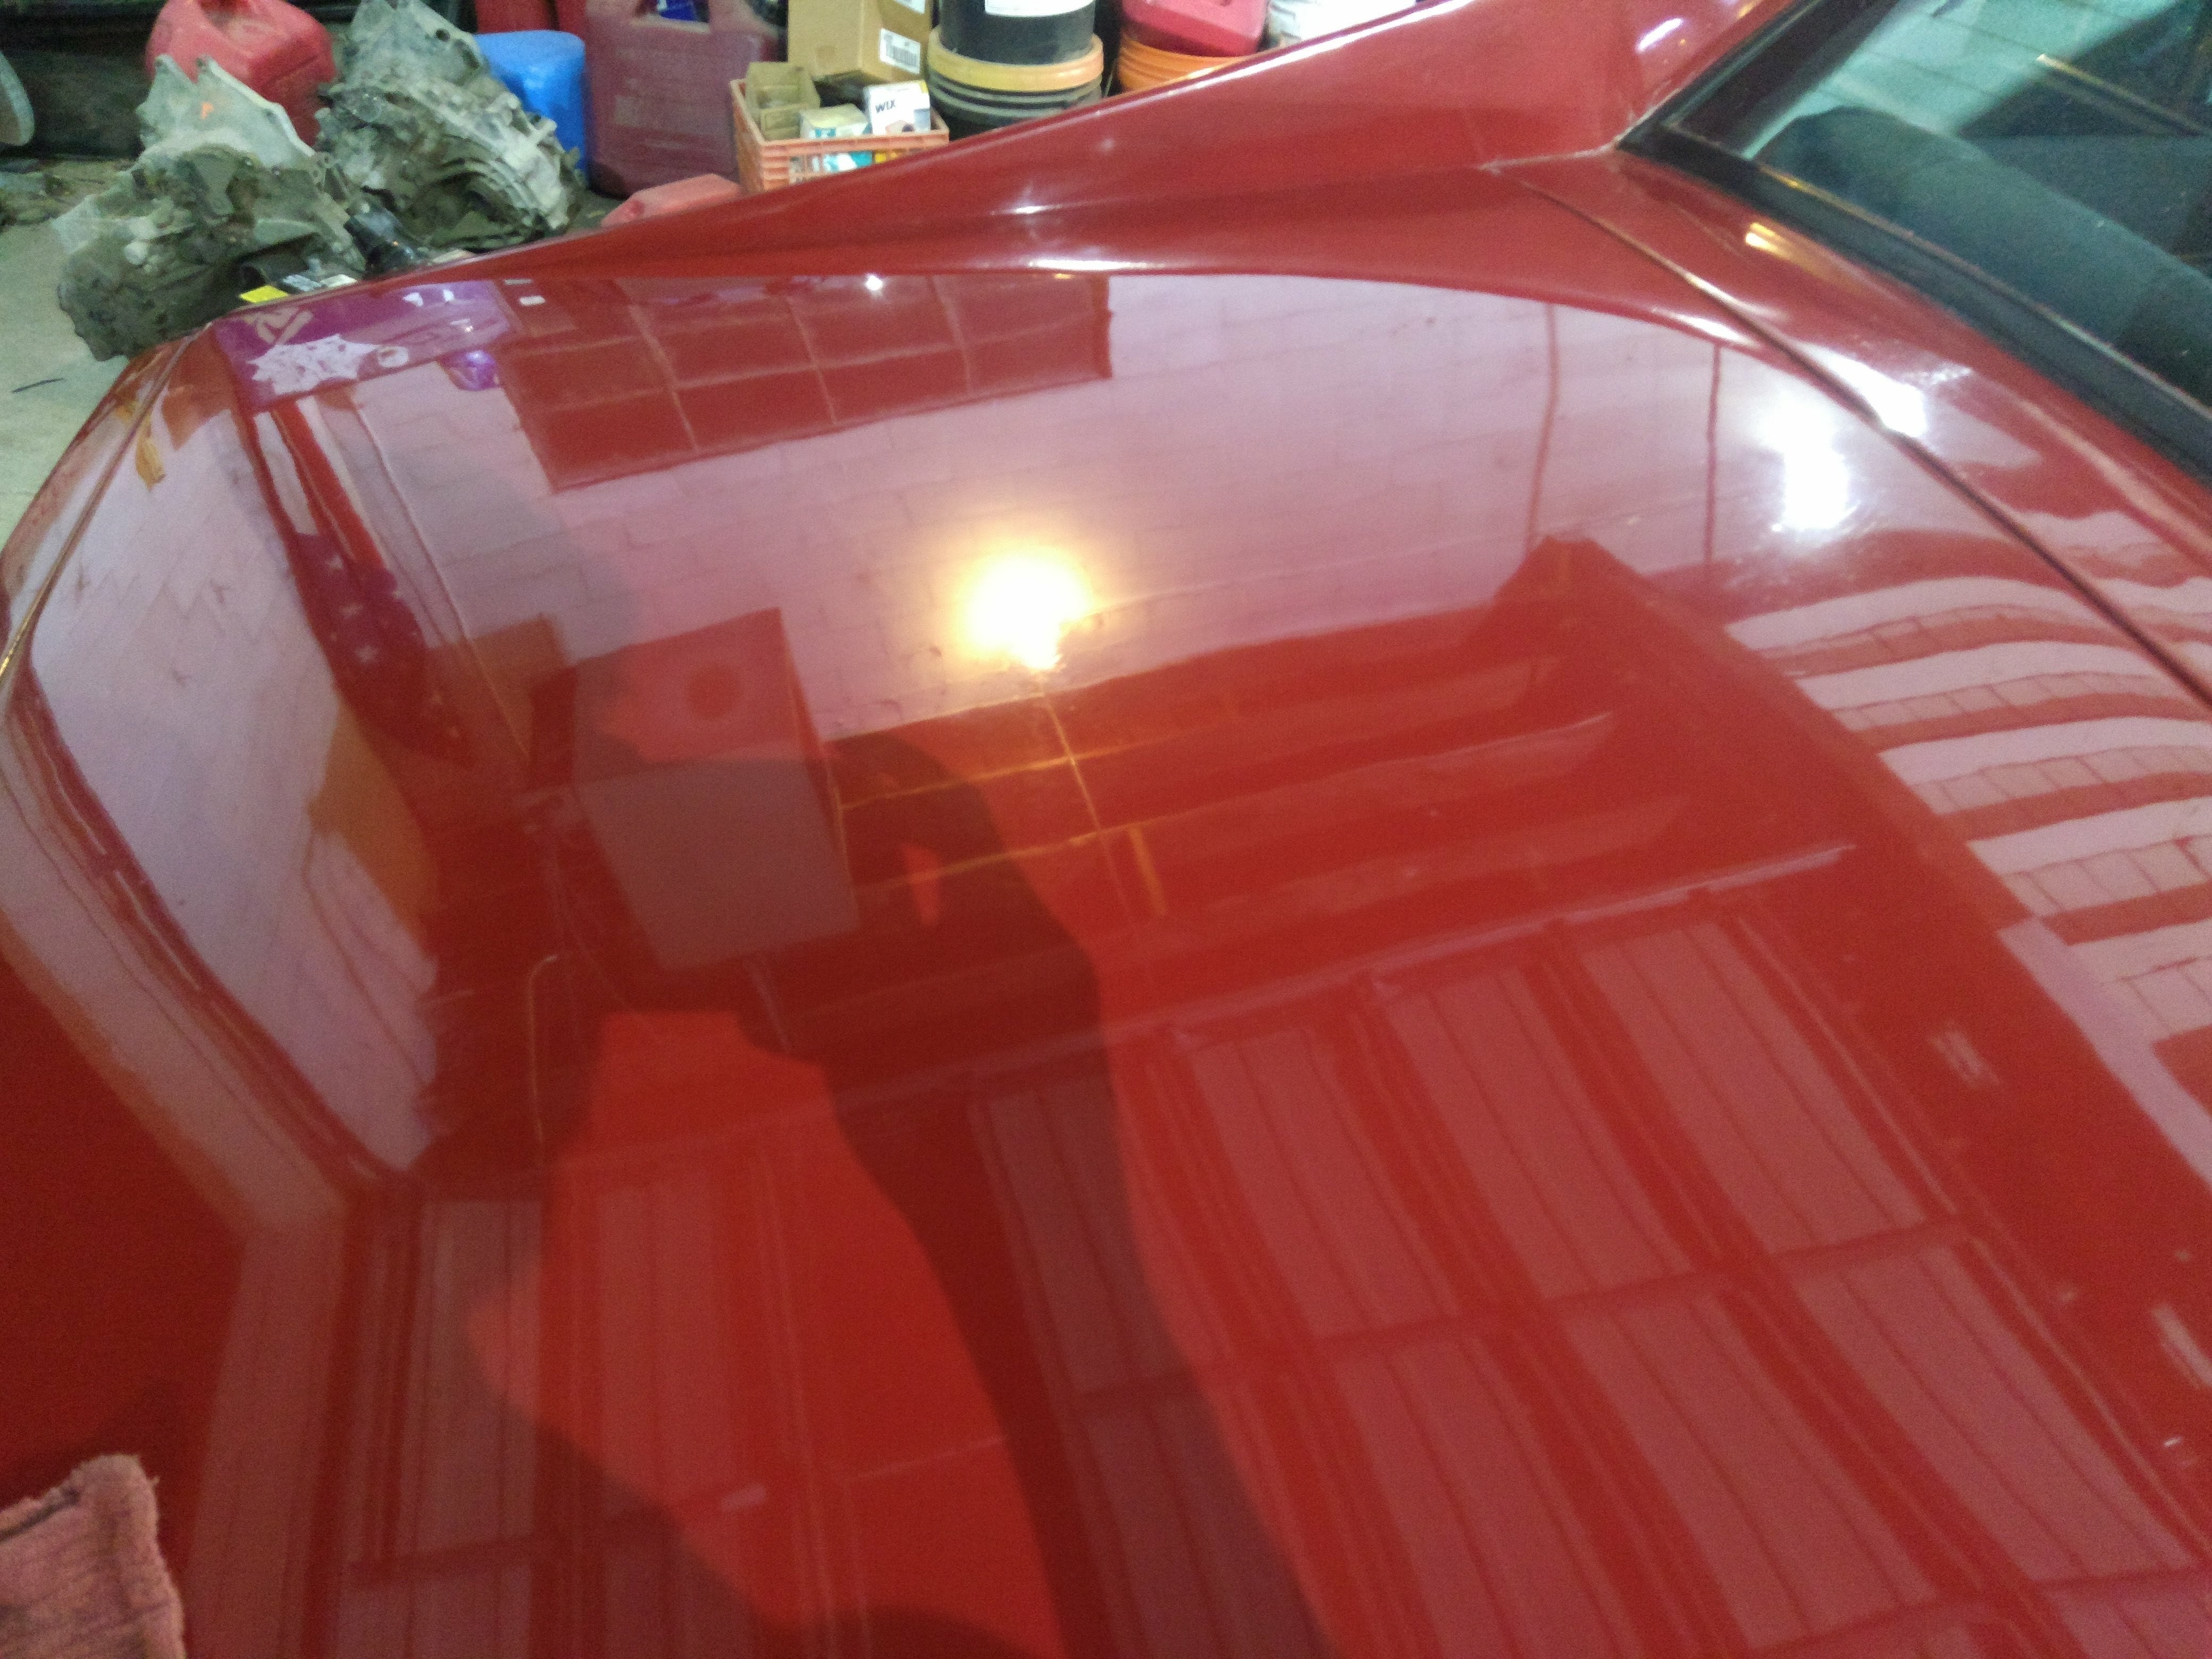
After the second stage things were looking up. A majority of the swirls were gone, all the hologramming was gone, and I was feeling good. More time spent on the second stage probably would have been able to get even more of the swirls out of the paint but it was nearing midnight at this point and still triple-digit heat and high humidity making me resemble Dwayne Johnson’s perpetually baby-oiled-up body in Fast and Furious.
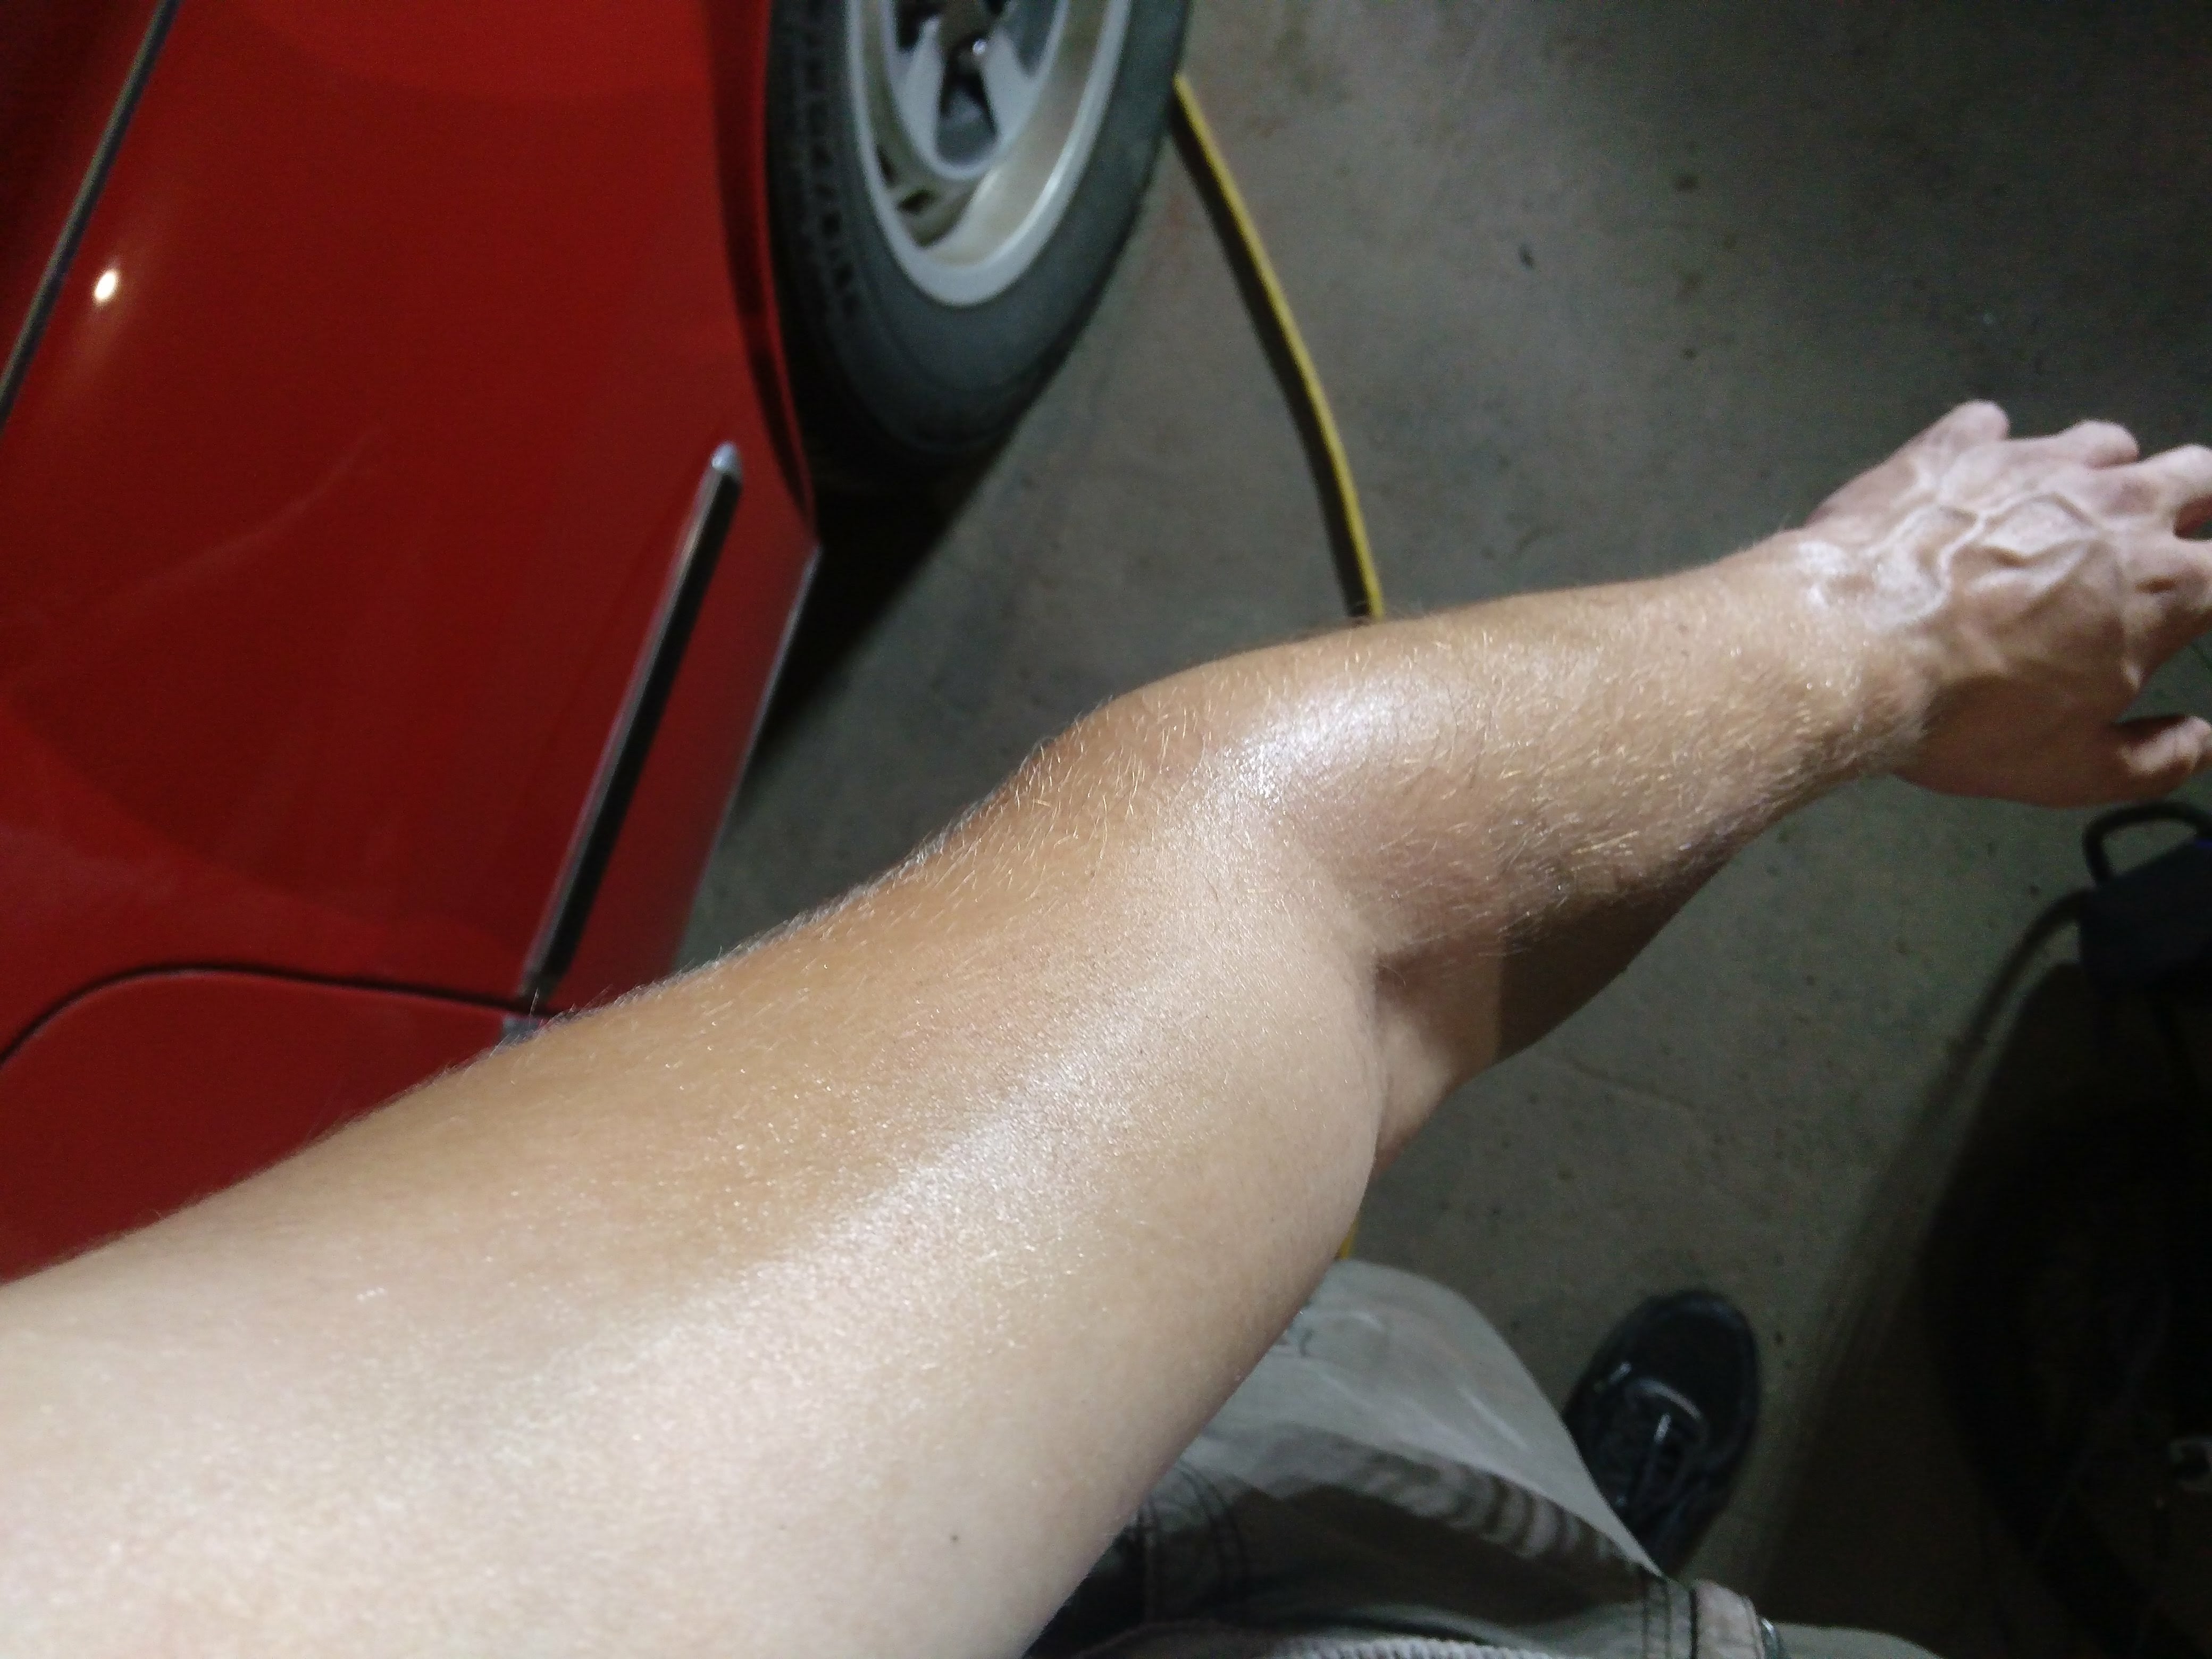
Except, you know, less muscles. I was almost as shiny as the car and dripping sweat onto the buffer wasn’t resulting in a super fun time.

There is some light scratching that shows up in direct sunlight. Overall, though, the improvement is drastic.

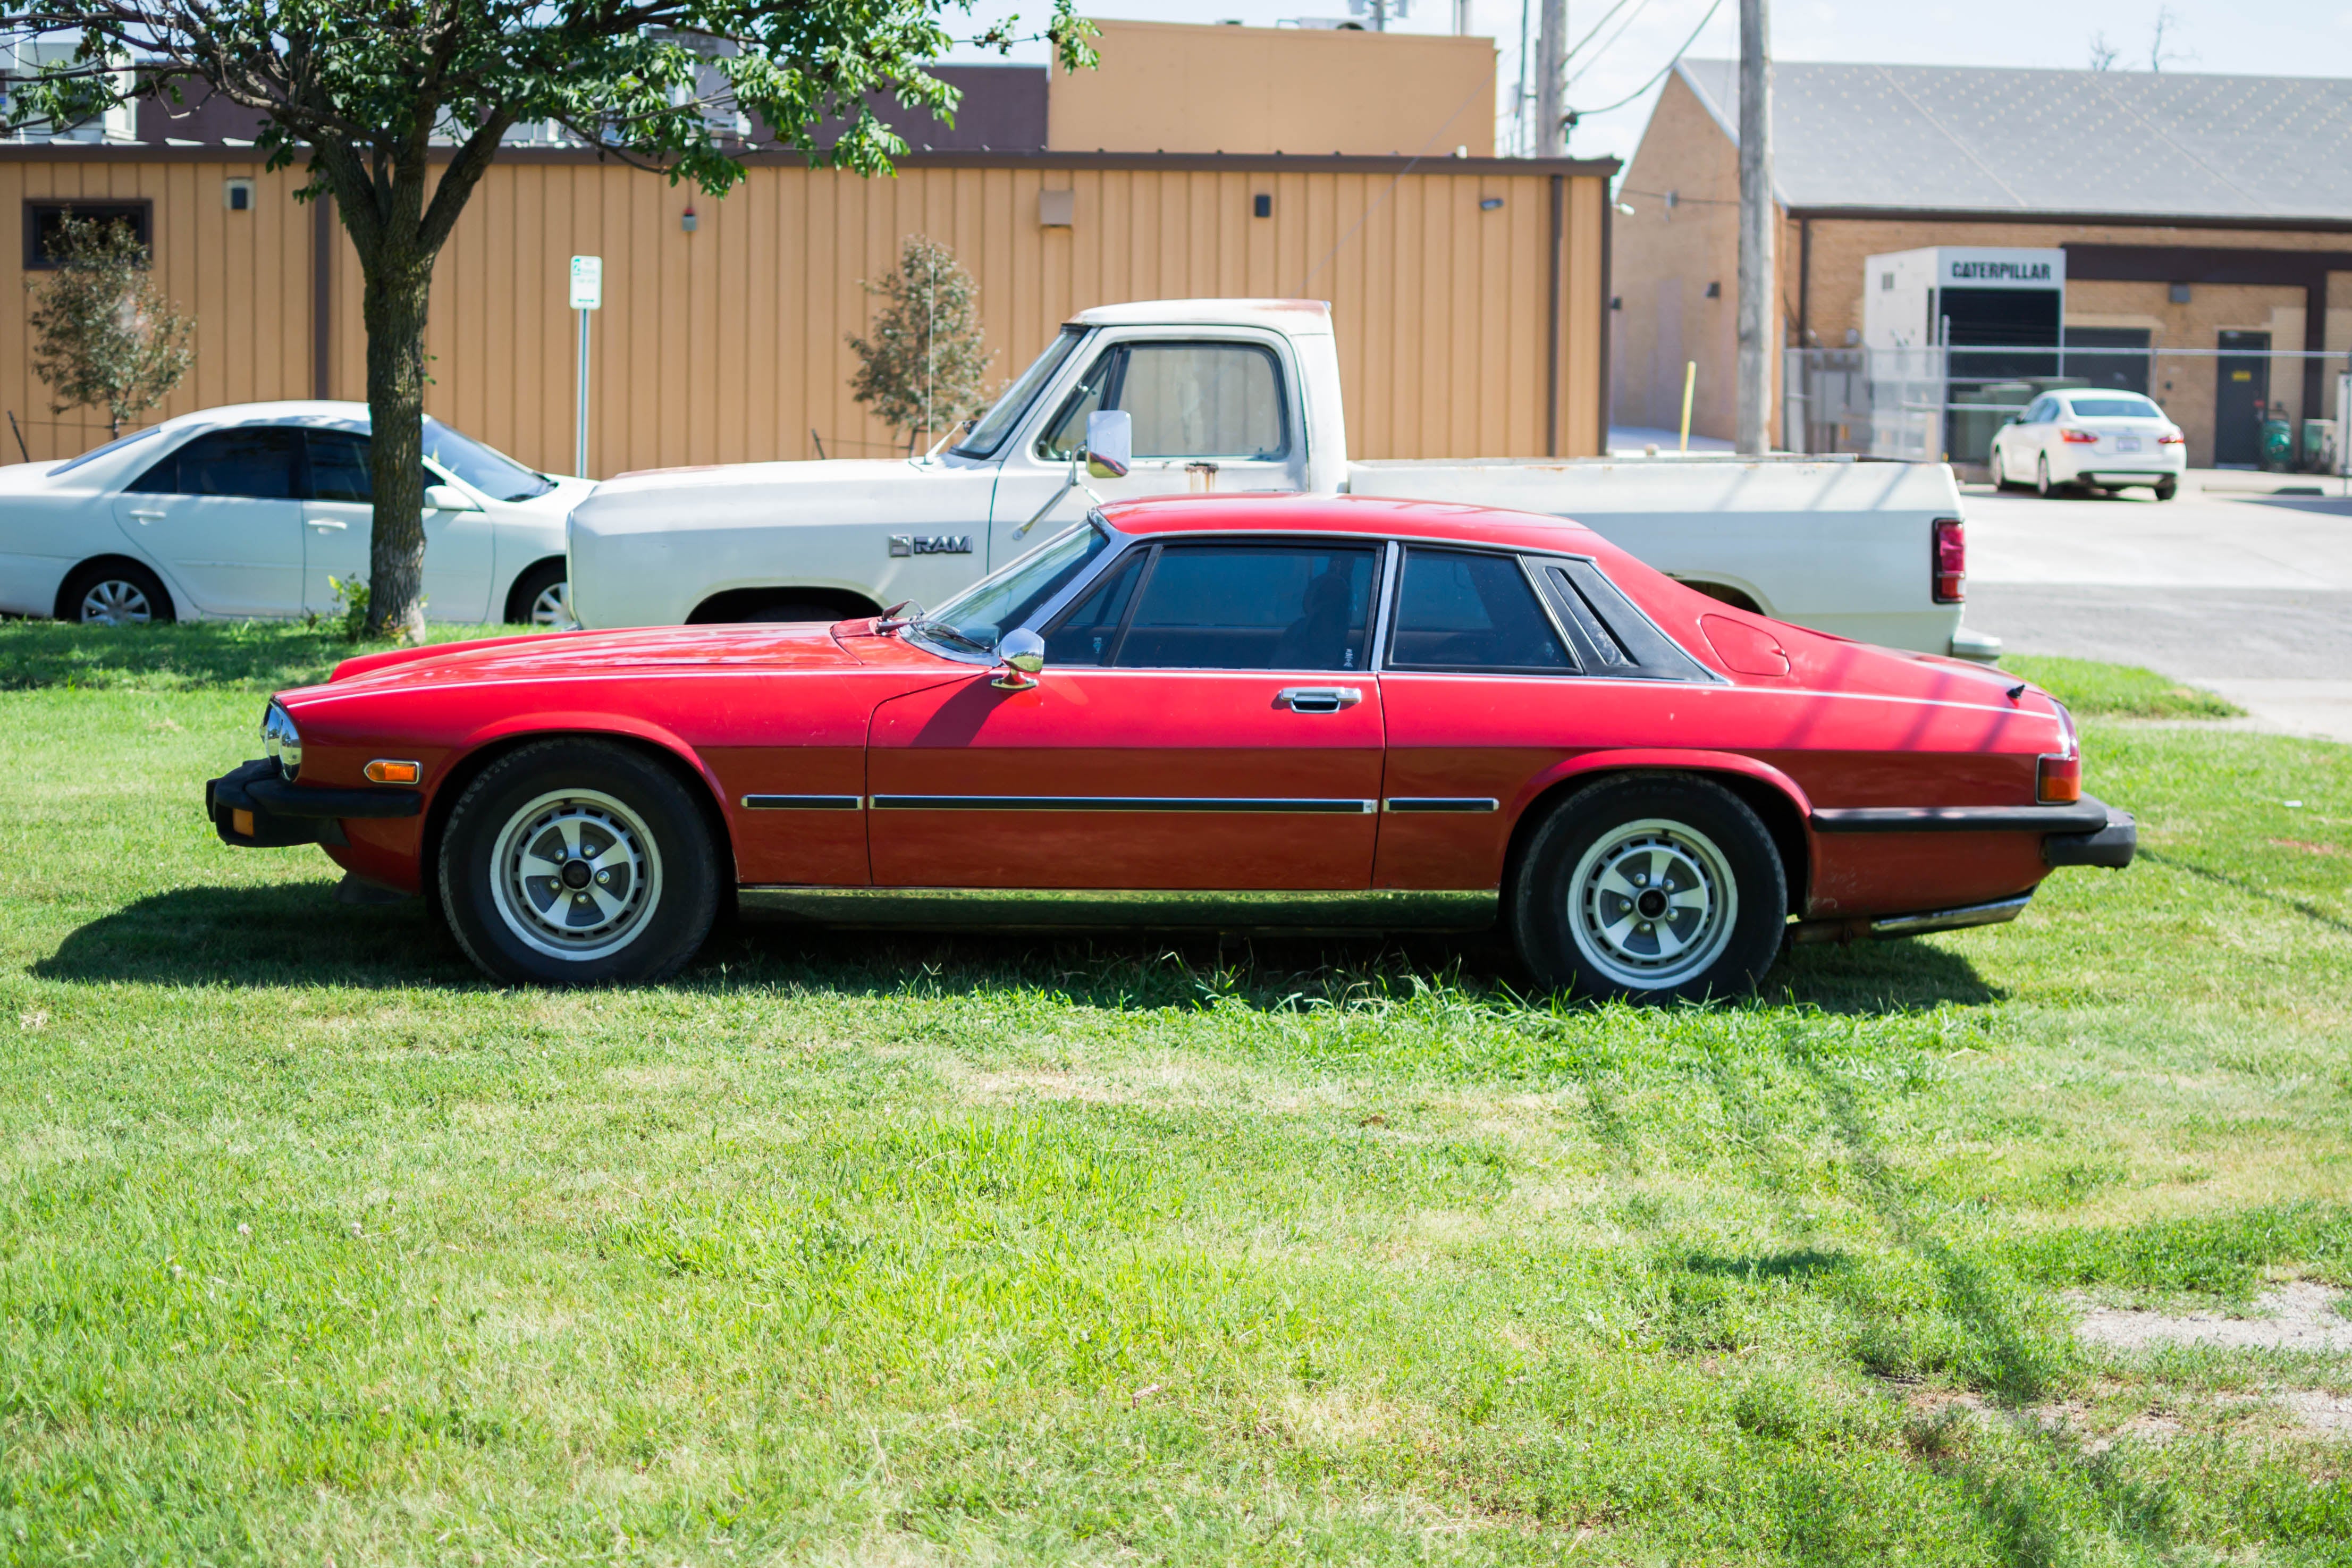
The big takeaway here is that with 6 hours of work I have managed to go from considering a full respray of the car to being fairly satisfied with the appearance of my car. The hood will likely require a respray, as well as some spot touch-ups of areas where the paint has peeled and where rust repair is necessary for a full respray has been held off for a while longer yet.
Blah blah blah somebody please love me on !!!error: Indecipherable SUB-paragraph formatting!!! , a long-form blog about cars and life. But with less Kinja. Seriously. Every time I pasted some text here Kinja duplicated the first two pictures. I had to delete 22 pictures. I wish for the slow death of this platform
 arl
> Jake - Has Bad Luck So You Don't Have To
arl
> Jake - Has Bad Luck So You Don't Have To
07/18/2017 at 10:06 |
|
Looks great! I’ve only used a dual-action polisher (love my Griots Garage polisher). I cringed a bit when you said you started with the rotary and wool pads. Those things scare me, but you done good!
 RamblinRover Luxury-Yacht
> Jake - Has Bad Luck So You Don't Have To
RamblinRover Luxury-Yacht
> Jake - Has Bad Luck So You Don't Have To
07/18/2017 at 10:17 |
|
What is pushing me over the line into looking at a full respray on the Galaxie is the fact that it has *been* resprayed in not quite the right color and that is now failing. Which sucks. Thick butter-like OEM lacquers that can be ground down FTW.
 haveacarortwoorthree2
> Jake - Has Bad Luck So You Don't Have To
haveacarortwoorthree2
> Jake - Has Bad Luck So You Don't Have To
07/18/2017 at 10:19 |
|
You are a brave man going with wool pads your first time out. Looks nice.
 RallyDarkstrike - Fan of 2-cyl FIATs, Eastern Bloc & Kei cars
> Jake - Has Bad Luck So You Don't Have To
RallyDarkstrike - Fan of 2-cyl FIATs, Eastern Bloc & Kei cars
> Jake - Has Bad Luck So You Don't Have To
07/18/2017 at 10:33 |
|
Purdy...what that Jag needs is a Euro headlight conversion...
 notsomethingstructural
> haveacarortwoorthree2
notsomethingstructural
> haveacarortwoorthree2
07/18/2017 at 10:34 |
|
one thing that’s great about saying “eh i probably need a respray” is you dont have much to lose
|
Jake - Has Bad Luck So You Don't Have To
> RamblinRover Luxury-Yacht
07/18/2017 at 10:42 |
|
Not so much the case on older cars, but anything new enough to be machine-sprayed will be far, far thinner than any respray.
|
Jake - Has Bad Luck So You Don't Have To
> arl
07/18/2017 at 10:43 |
|
The thing about 80s and 90s single stage resprays: They’re obscenely thick. The Mustang has four or five of such resprays stacked on top of each other and the paint is over an eighth of an inch thick as a result.
 TheRealBicycleBuck
> Jake - Has Bad Luck So You Don't Have To
TheRealBicycleBuck
> Jake - Has Bad Luck So You Don't Have To
07/18/2017 at 10:54 |
|
I made the mistake of trying a new product on my hood. An hour later, the clear coat started peeling off. Whoops.
|
RamblinRover Luxury-Yacht
> Jake - Has Bad Luck So You Don't Have To
07/18/2017 at 11:17 |
|
There are sections of the Galaxie that have original color poking through, sections in which the respray has just gotten thin and the original color shows through kind of translucently, sections with failing clearcoat, a few areas with two layers of respray and one flaking off the other...
...sections with a rust spot that wasn’t treated and has boiled through or a spot was rubbing and not addressed, a couple places with primer overspray onto the original paint, and one section where a bunch of bad bondo was just quietly cracking out all the way down to the metal, and where I RustOleumed it after grinding out the bondo until I get a chance to do it right.
Contrast with a red ‘79 Benz 240D that’s in the family, which never had clear on it. Ground it down, waxed, good to go.
|
Jake - Has Bad Luck So You Don't Have To
> RallyDarkstrike - Fan of 2-cyl FIATs, Eastern Bloc & Kei cars
07/18/2017 at 11:45 |
|
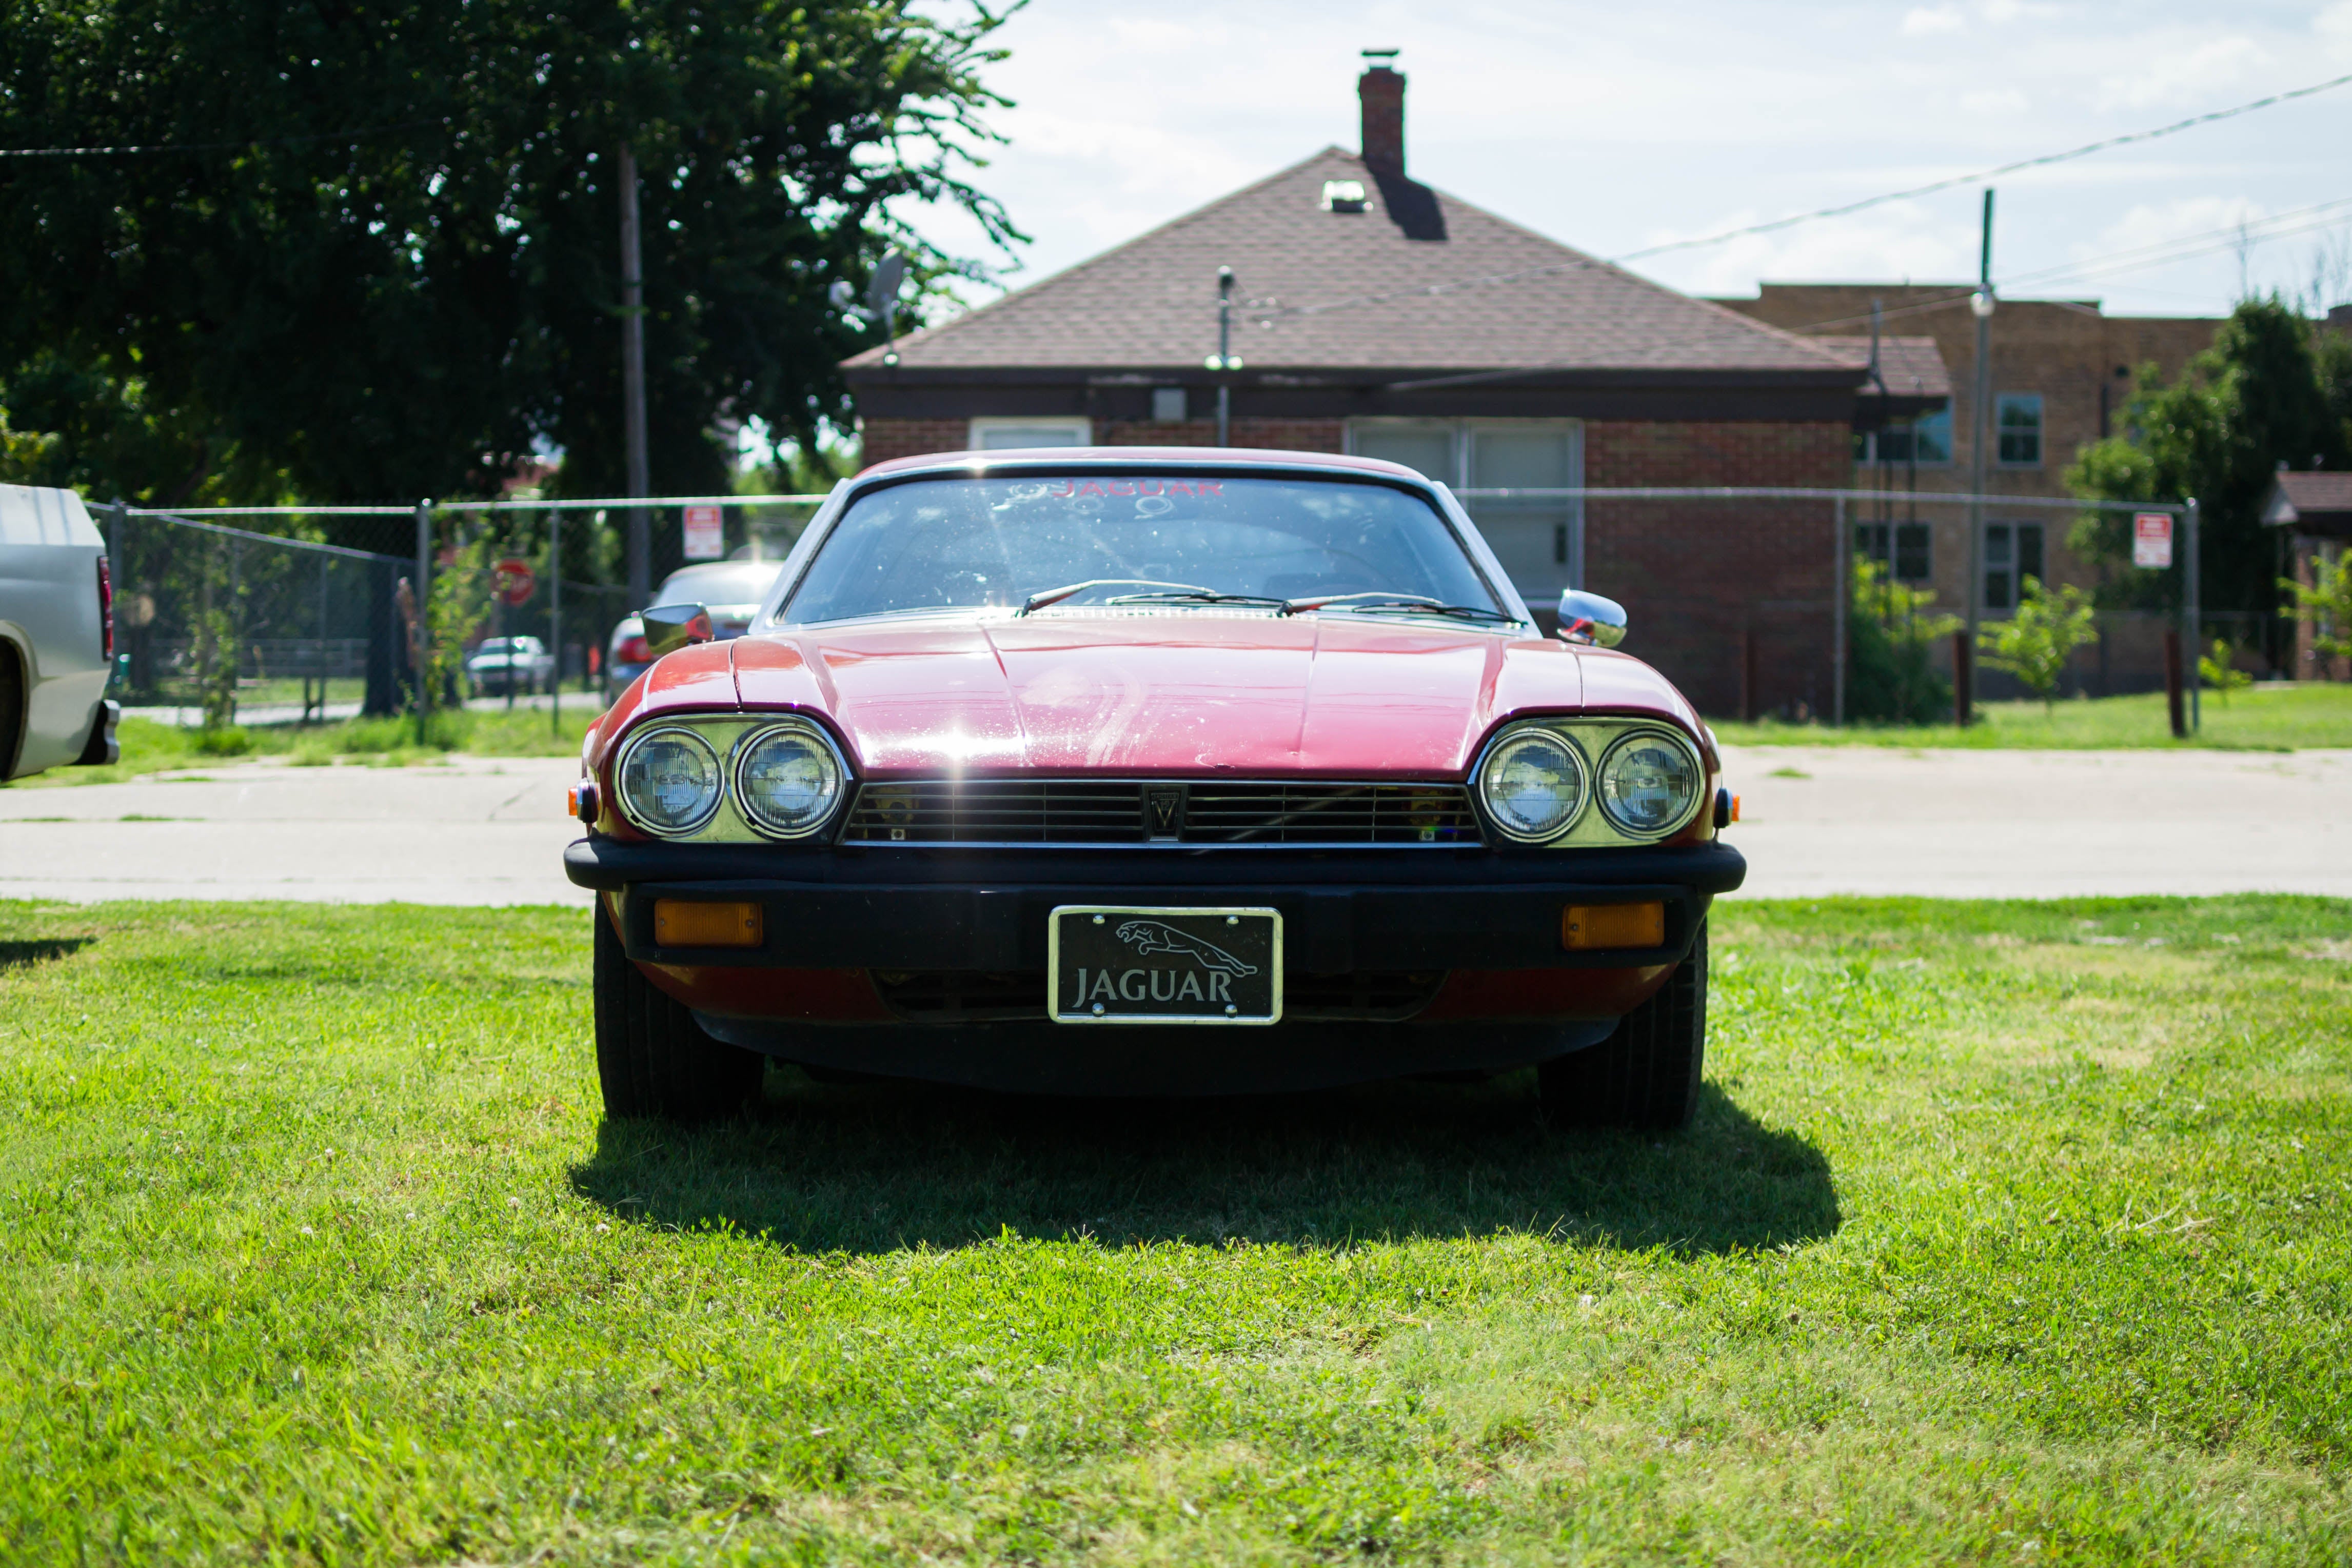
These are Euro headlights. All XJ-Ses before the “HE” facelift were quad-headlight. Personally I prefer it because I can get drop-in sealed-beam-style projector conversions and have modern headlights.
|
RallyDarkstrike - Fan of 2-cyl FIATs, Eastern Bloc & Kei cars
> Jake - Has Bad Luck So You Don't Have To
07/18/2017 at 15:50 |
|
Huh, didn’t realize that! Modern lights ftw....there are prob LED projector sealed beams available too.
|
Jake - Has Bad Luck So You Don't Have To
> RallyDarkstrike - Fan of 2-cyl FIATs, Eastern Bloc & Kei cars
07/18/2017 at 16:02 |
|
K i’m wrong. Plastic lights were Euro standard. Derp.
 DrScientist
> Jake - Has Bad Luck So You Don't Have To
DrScientist
> Jake - Has Bad Luck So You Don't Have To
07/25/2017 at 23:54 |
|
i think the early euro lights are actually glass cibies. rare as hen’s teeth. if you find a set they’ll be a pretty penny.